
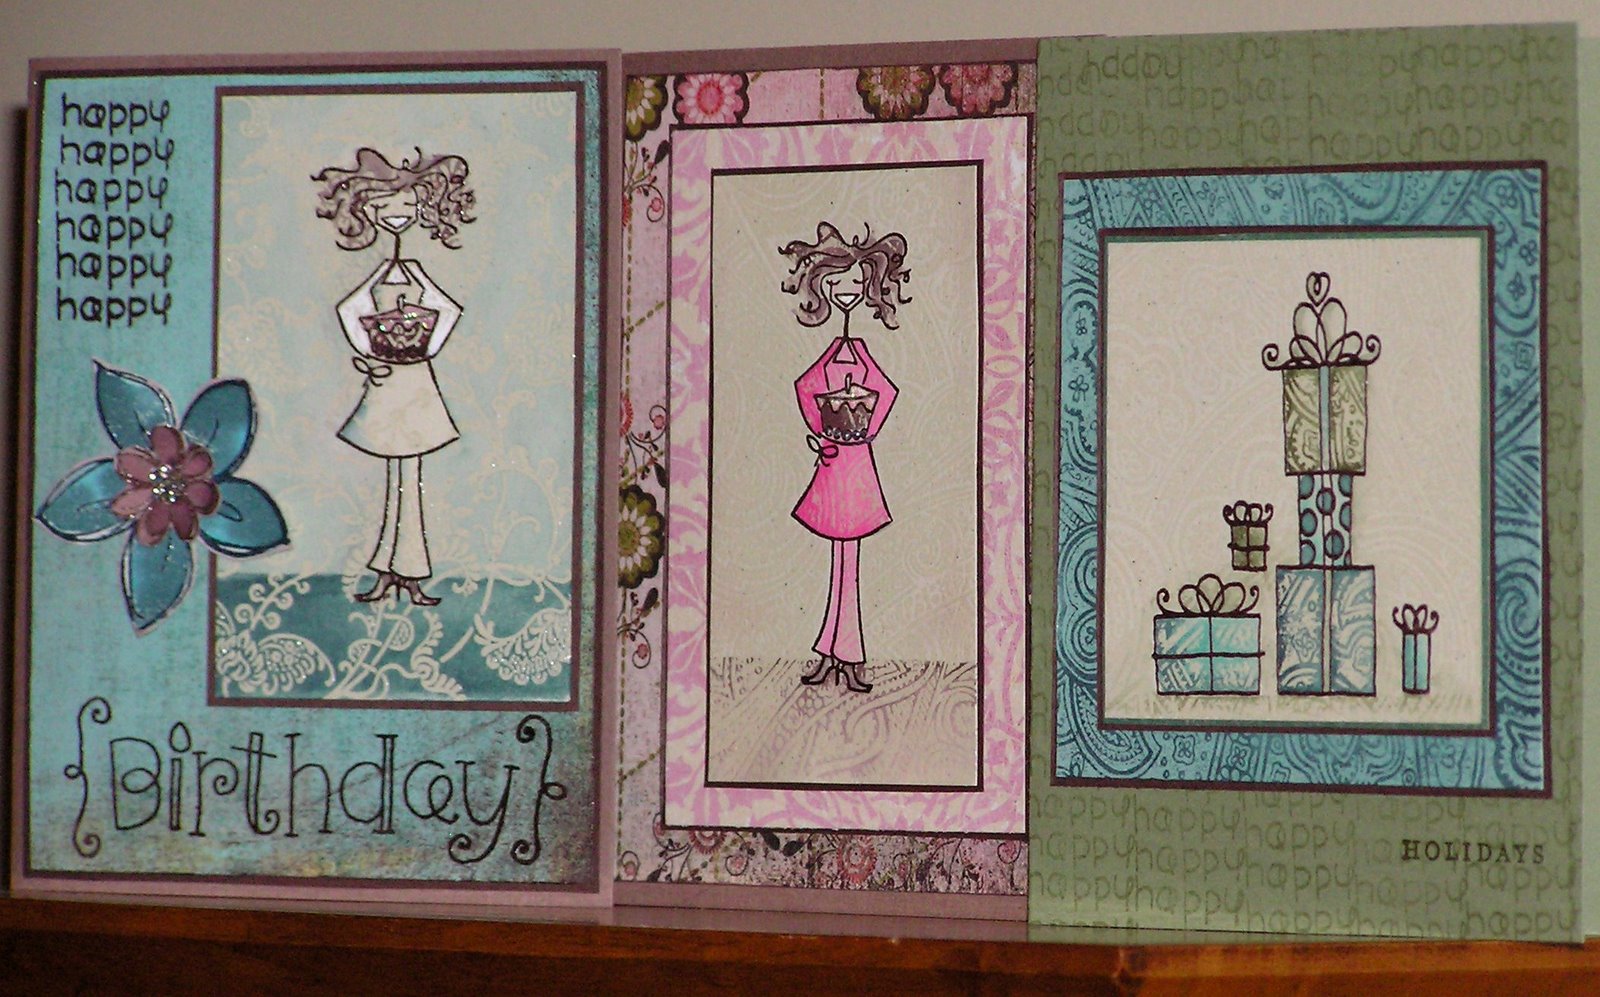
 Here's a couple of cards made with what I'm calling the magic pattern technique. It is SOoooooooo much fun to do--reminds me of those colouring books I had as a kid, where you took a paint brush with water & the colour magically appeared, (only this is in reverse!) :0)
 The flash gave too much sheen to this photo above, but hopefully you get the idea. The texture looks a lot like this card for which the photo worked better for some reason.
 Step 1:
 Edited to Add: In trying to perfect this technique, I've learned that this works way better if you don't emboss the first line image & just stamp it in Stazon or a waterproof ink instead.
Stamp a line image in a dark waterproof ink (I love the bellas with this technique.) Allow to cool and make sure it is fairly flat (not curled from embossing.) To prevent curling you can heat from the front & the back of the paper. I like to use detail powder for crisp lines.
Side Note: you can also add details at this point which you'd like to be solid (and under the embossing--like colouring the hair or adding a line for the floor.) before moving onto step 2-- Secondary embossing:
Place the versa-marked background stamp over your previously stamped line image; press firmly on the stamp all over to make sure it's covering well. Cover the image with clear embossing powder & heat. Here is the result:
 Step 3: After your embossing cools, use reinkers or an ink from a stamp pad & an aqua-painter to paint a wash of colour over your piece. Try not to make the wash too watery (because too much water will make the paper curl a lot. After the colour sets in a little, blot with paper towel, if there is any reinker on the surface of the embossing.
ETA: You can use any method you like of adding colour, watercolour wonder crayons, pearlescent paints, water-based markers, anything that will still let the embossing powder resist

Step 4: Go in with any deeper shading or details you'd like to add. Craft ink works great for deepening colour, because it's so rich in pigment. If you have a hard time getting a straight line along the image (for a floor for instance) try working from the side; it's easier, since your right brain kicks in and recognizes the line (instead of your left brain labeling things (ie: floor, Bella, feet) Sounds whacked but it's true--I swear! :0)
If your paper has curled at this point, you can set your image under some books for a while or just shape it with your hands and use a good amount of decent adhesive--especially around the edges. That may seem like a pain, but it seems worth the trouble to me to be able to use any card stock you like instead of having to use water-colour paper--(with water-colour paper the texture would likely prevent this from working anyhow.)
I also added white signo gel pen details at this point (for teeth and cake & on her blouse); I've added some Stickles to ice the cake.
Thanks so much for looking;if you try this, please please please leave me a link to your creation,

P.S. More on Magic Pattern here, ETA: magic pattern primas tutorial here, & magic pattern silhouette here.
ETA: P.P.S. You can find a version of this technique (with watercolour wonder crayons) published in Pat Huntoon's Technique Junkies newsletter February 2008 (my first publication, *GRIN!*) :O)
oh my....this is really interesting! I need to read it again when I have a bit more time....definately want to try this! Thanks for the awesome details on how to do it!! Very cute cards!!!
ReplyDeleteMel, you rock my stamping world! These cards are great! Thanks for sharing the technique. I'm totally trying this one out tonight.
ReplyDeleteJust terrific Mel!
ReplyDeleteThese are great, thanks for the turorial. Loving your blog, it is great.
ReplyDeleteThese are ABSOLUTELY beautiful! They are just amazing! Great job!!!
ReplyDeleteNow this is super cool. We'll have to try this out!!! Love the cards. Hey..is that the paper I gave you last weekend? :o)
ReplyDeleteWow! THanks for the awesome tutorial!! The cards are simply delightful!! I just stopped by to check out your site and say hi - I'm from SBS1 and have added all the SBS2 sister to my blog! I'll be back to see what you've been busy creating!
ReplyDeleteGreat technique! I'll have to try this!
ReplyDeleteCards are super cute and thanks for the tutorial! I hope to get some of these stamps this Christmas and I'd like to try out your tut!
ReplyDeleteWhat a great technique & a fab idea! Thanks for explaining it so well.
ReplyDelete