I'm so excite-ipated! These are my first non-hand-drawn templates (made entirely in Photoshop) I still suck at it technically (and it takes me forever), but the template lines are straight & even (at least I think they are) ;-D LoL
The new envelope templates &
a little blah-blah-blah about them:
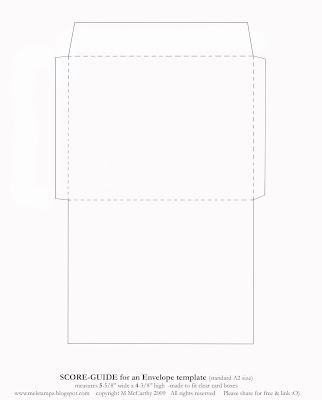
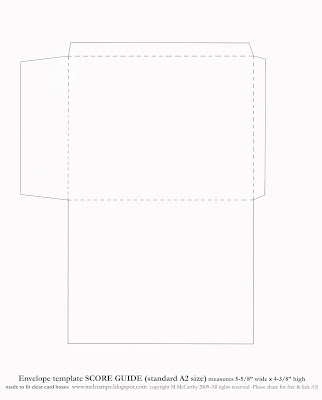
-->There are two envelope styles here: side & top opening.
Both styles fit a standard A2 card size (4 2/8 x 5 1/2 inch card)
with room for layers on your card:
Both styles fit a standard A2 card size (4 2/8 x 5 1/2 inch card)
with room for layers on your card:
-->Measurements: Both styles of envelope measure 4-3/8" x 5-5/8"
-->They are sized to fit in clear acrylic card boxes.
(here's a set of top-opening (or tall ones) that I scalloped & embossed;
there are four of them in a thin acrylic card box on the left.)
(here's a set of top-opening (or tall ones) that I scalloped & embossed;
there are four of them in a thin acrylic card box on the left.)
-->There are two template versions of each envelope style:
A) a template & B) a score guide.
A) a template & B) a score guide.
(A) template
A) The template version has no dotted scorelines on it--you could use it for printing right on patterned paper or add your own patterns using Photoshop brushes (or fill with pattern.)
(B) Score Guide
B) The score guide version has dotted lines to show where to score & fold.
Click this link to Download Side-
Opening A2 Envelope (short style) :
(or click the pics to try the JPGs instead
-not sure if JPGs will print at the right size though)
Opening A2 Envelope (short style) :
(or click the pics to try the JPGs instead
-not sure if JPGs will print at the right size though)
or
Click this link to Download Top-
Opening A2 Envelope (tall style) :
(or click the pics below to try the JPGs instead
-not sure if JPGs will print at the right size though)
matching envelope liner
(for top-opening envelope):
(for top-opening envelope):
and here's an example patterned one I'm working on....
mathLEDGERmedium.jpg)
If you have Photoshop & you'd like to know how to make your own patterns and/or fill a template with pattern, please let me know. :O) E.T.A. tutorial for fill with pattern is here
Hope these come in handy, :o)


.jpg)
.jpg)


.jpg)

.jpg)


Hi Mel.
ReplyDeleteIf you ever have Photoshop questions just let me know, I'm pretty proficient in the program. And I'm not sure how you're drawing your straight lines - with the line tool or the pencil tool, but if you hold down the "shift" key it should constrain them to either vertical or horizontal so you don't have to worry about eye-balling the straightness yourself. :)
Holy Moley. This is fantastic Mel! You have been one busy girl.
ReplyDeleteHugs
Deb
x
how cool! clever you....think I've said that before...yeah, like a gazillion times! I'd love to know how you used PS *wink*
ReplyDeleteThanks MEL!!!! Downloading NOW :)
ReplyDeleteNice boxes and envelopes!! I admire your persistence into photoshopability.. (yes, that is a word LOL). Usually I would do these in vector like Illustrator, but I think they muddled all these programs together now into one lump. What a great idea with the print inside the box, totally love that!
ReplyDeleteThank you so much for the great ideas. I areally appreciate the envelope templates. You rock!
ReplyDeletegreat blog you have here, love all the ideas you share, you ROCK! will add you to my sidebar :)
ReplyDeleteThank you for all the templates and tutorials. Love that card box. Scor-pal now on my shopping list.
ReplyDeleteMuch love,
Marcia
Thanks so much for taking the "work" out of envelope making with all these easy-peasy patterns! Appreciate it a lot! :0)
ReplyDeleteMel, in Portuguese, means "honey", and it seems that u are "sød", (sweet in Danish), that here it is the result of it, everybody just love it! I really would like to thank you for the inspiration! thank you for sharing!
ReplyDeleteThank you so much for sharing Mel. You are one talented lady!
ReplyDelete