


Can you ever have too many ways to use your stash?

No card today, just popping in with a cheap trick for
revamping your "old" patterned papers
using some overlay freebies I've made that you can
quickly drag and drop using Photoshop
or simply print out.
Go from this...

revamping your "old" patterned papers
using some overlay freebies I've made that you can
quickly drag and drop using Photoshop
or simply print out.
Go from this...

...to this:

And then print it out
to get papers that are something like this...

And then print it out
to get papers that are something like this...

It only takes a couple of minutes
(and it uses a lot less ink than printing the original papers.)
Here's a closer look at the bold circles
that the white overlay makes:
that the white overlay makes:

(The digital paper used to make the paper above is from
Old Things Papers By Vinnie Pearce from Two Peas in a Bucket)
Old Things Papers By Vinnie Pearce from Two Peas in a Bucket)

Make your own custom papers
using a circle overlay
(Digitally or Traditionally)
This post focuses on a stash-busting idea for your digital papers.
Don't do digital?
If you want this look...
(and you are okay with using up some black printer ink)...
you could print the black circle overlay
over top of store-bought patterned papers instead of digital ones.
Don't do digital?
If you want this look...
(and you are okay with using up some black printer ink)...
you could print the black circle overlay
over top of store-bought patterned papers instead of digital ones.

I like working with the PNG files in Photoshop,
since that keeps the transparency of the overlay:
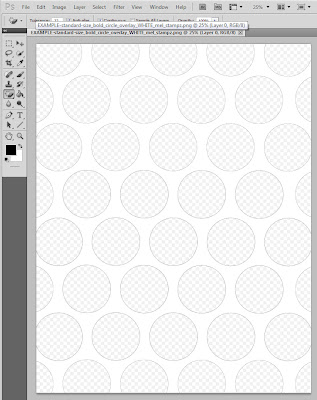
(The checkered grey pattern indicates the transparent areas where your patterns will show as circles or whatever shape the overlay has as the transparent portion. Your "gamut" which is the technical name for the background showing through, may be set at another colour so it might look different than this.)
However, there are also JPEGs & PDFs
in case you prefer working with them.

Circle Overlays in black:
12.5 inch square
(300 dpi)

Click these links for the best download quality:
Download the PNG here (acrobat)
or
Download the PDF here (acrobat)
the JPEG here (acrobat)
JPG (Flickr)

standard size
8-1/2 x 11 inches (300 dpi)

Click these links for the best download quality:
Download the PNG here (acrobat)
or
Download the PDF here (acrobat)
the JPEG here (acrobat)
JPG (Flickr)
Circle Overlays in WHITE:
12.5 inch square
(300 dpi)

Click these links for the best download quality:
Download the PNG here (acrobat)
or
Download the PDF here (acrobat)
the JPEG here (acrobat)
JPG (Flickr)
standard size
8-1/2 x 11 inches (300 dpi)

Click these links for the best download quality:
Download the PNG here (acrobat)
or
Download the PDF here (acrobat)
the JPEG here (acrobat)
JPG (Flickr)
Please note: the white overlay images above are just an example
not the actual file. The circles do not have such pronounced
black outlines in the actual downloads.
12.5 inch square
(300 dpi)

Click these links for the best download quality:
Download the PNG here (acrobat)
or
Download the PDF here (acrobat)
the JPEG here (acrobat)
JPG (Flickr)

standard size
8-1/2 x 11 inches (300 dpi)

Click these links for the best download quality:
Download the PNG here (acrobat)
or
Download the PDF here (acrobat)
the JPEG here (acrobat)
JPG (Flickr)
Circle Overlays in WHITE:
12.5 inch square
(300 dpi)

Click these links for the best download quality:
Download the PNG here (acrobat)
or
Download the PDF here (acrobat)
the JPEG here (acrobat)
JPG (Flickr)
standard size
8-1/2 x 11 inches (300 dpi)

Click these links for the best download quality:
Download the PNG here (acrobat)
or
Download the PDF here (acrobat)
the JPEG here (acrobat)
JPG (Flickr)
Please note: the white overlay images above are just an example
not the actual file. The circles do not have such pronounced
black outlines in the actual downloads.

...use these five different ways:
Basic ways to use the overlay:
#1 Use the black ones as is: just print & use for dotted paper (or use them digitally as is for background on digital scrapbook pages).
#2 Fill the white overlay area (the space around the circles) with any custom colour and save it.
#3 ...Or fill the white overlay area with any custom pattern.
#4 The Drag & Drop method: A speedy way to make a custom paper with circles of a single pattern:

It takes only a couple of minutes to make the paper & print:
Step 1) Copy the patterned paper file that has the pattern you want to make the circles out of.
Step 2) Drag & Drop the circle overlay PNG file onto the patterned paper.
Step 3) Right click & select "place" (or choose it when prompted to).
Step 4) Use the Move Tool to center the overlay.
Step 5) Save as a copy and print it out, or use it digitally.
(The screenshot above shows the overlay as I was moving
it into position in step 3)
A fancy custom way to use the overlays
#5 The Fill with Pattern method: Make a custom paper with different circles
that feature a variety of patterns:
that feature a variety of patterns:

(This paper was made with the black circle overlay & Cosmo Cricket's
digital paper pack Matilda & Printed on 140lb watercolour paper)
Fill each individual circle with a different pattern.
This takes a little bit of time, but you end
up creating something one of a kind.
It's a fun way to show off all
of the different papers in digital packs
or use colours/patterns you might normally shy away from.
You can even change it up each time you use it by printing it on
different types of paper.
Here's how to make multi-pattern circles
using these overlays:

Step 1) Open the circle overlay PNG file in Photoshop or the program of your choice.

Step 2) Fill each circle with a different pattern. Turn your digital papers into patterns (using edit and define pattern). Then hover over each circle with the paint bucket tool (set to pattern instead of foreground) and click to fill each circle.
For a complete pictorial on how to create your own custom patterns
in Photoshop and how to use them to fill things, please visit this post:


Step 3) Save a copy & print it out, or use it digitally.
Here are some examples of variations on the paper above.
You can change the colour of the overlay area after you fill in the patterns to get different looks in a hurry:

Once I had created the black version, I decided I wanted a white one,
so I just filled the black area with white to make the lighter version above.
You can even change the colours after making the patterns:

This version was made by taking the white one, inverting it in Photoshop (image - adjustments - invert); then, changing the colour (sliding the yellow scale all the way to the left).

(for the overlays)
No resale of these as digital files, of any kind, please.
Please feel free to share any digital papers that you make with these,
as long as they are shared for free. Link this post, pretty please. :o)
You can also sell any crafts you make using these,
(provided that they are handmade items). Thanks!
as long as they are shared for free. Link this post, pretty please. :o)
You can also sell any crafts you make using these,
(provided that they are handmade items). Thanks!
Hope these tickle your fancy!

P.S. Mouse is doing so fabulously you wouldn't even believe it! And all our snugglin' is helping me get better too. Thank You ever so much for being the finest blog buddies in the Universe.
P.P.S. Photo dressing thanks to Pugly Pixel tape (re-coloured) from here


36 comments:
Incredible tips for revamping PP's from my stash! I may have to try this. I love your creative mind, thanks for sharing!
Mel... thanks so much for the cool overlays! These will be fun to play with, and give us all a little more bang for our buck too!
Glad your kitty (and you!) are doing better. Love that top paper and what a great idea! I don't do digital but I am thinking I could even just cut out a zillion circles and lay it out as you did. I'm excited to give it a try!
You are amazing! One of these days...when I'm not behind and can sit and play with PS, I'm going to try this!
I'm so happy to hear that both you and Mouse are getting better!! Keep it up!
R/
thanks for the fab overlays & 'how to' Mel- these are so fun! so glad to hear you & mouse are feeling a little better!
great idea - thanks for the downloads!
Sandra ltb
ooooh Mel, they look awesome! i will have to try and have a go at them!!
glad to hear you and mouse are recovering nicely hun
hugs Lou xxxx
This is just an awesome idea - will give it a try after my holidays
Thank you
Great idea! TFS
What a brilliant idea. Thank you so much. Lee x
Thanks so much. I would like to get into digi more, so I'm going to try these.
Such a good idea!
Who you are so impressive with all this. Thank you.
You have just changed my world!! I tried the overlays and looked back at your post for filling with a custom pattern. What fun this is and your directions are great. Thank you so much. My digi images are going to be a lot more interesting now.
Very cool idea. Thanks so much for sharing!
Thank you so much for sharing. The instructions are veerrry helpful.
Suzanne
Thank you very much for sharing!
This is so awesome, thank you for the tutorial!! How great to have a new way to use all of the digi papers I keep downloading!
Way cool.. thanks
Thanks for these overlays and for the cool tutorial and idea
Looks brilliant. Will have to find the time to have a go. Thanks for sharing this with us.
Tine :)
These are fantastic. Thanks so much for sharing.
Glad to hear that you and Mouse are feeling a little better.
Love Joan xx
fabulous, FABULOUS idea!!! you are just toooo smart!!!!
xoxo!!!
My goal for 2012 is to learn how to use Photoshop, digi images and paper. I will be checking out your sections as my tuts. TFS! kren
This is great, thanks Mel. I am stil struggling to master PSE but with directions such as yours I have been able to do the circle overlay.
I also tried with the hexagons but they don't seem to put your background paper in the hexagons just around the hexagons.
is it possible you could do some hexagons where it the inside of the hexagon has the patterned papers?
Thanks again for great tutorial, PSE is so hard to master so to this info on your blog is really helpful.
Have you got anymore overlays in mind?
Hugs Julie
Mel, thanks so much for sharing this great idea! I'm just getting into digital so will give this a try. You really are very talented. :)
Dear Blog Buddies! Some of you lovely people are no reply, so I'm hoping you'll see this.
1st Thank you, a million times over for liking this overlay schtuff and for your sweet well wishing. You are so NICE it makes me happy-cry.
2nd, Dear Julie. I'm so excited you like this. You're so right: I didn't think of the overlay thing with the hexagon paper, but now I'm gonna go back and work on that!
And yup, I have plans for others: chevrons; various stripes & squares; diamonds; ornament shapes. It just takes eons to upload them properly, so I'll be adding them to different project posts. I think I might try to make a tutorial showing everyone how to make their own custom overlays too.
Thanks again for liking them!
Hugs,
mel
OK I gotta say this again. You are, undoubtedly, the Queen of Creativity! You rock!
Wonderful tips for digital wizards!!! Good to see you feeling better too!
This is a great post and freebie! I am featuring you at Printable Decor today.
Hi Mel, I've just found your site! Thank you for your generosity, these tips and the overlays will really help me with my mixed media paintings ♥
Awesome! Thanks so much for sharing your tips and files! Love it!
I just discovered your site, and I'm in love! Thanks for sharing your amazing talents!
You are amazing and my new LOVE!!! Thank you so very much not only for all your amazing looking files, but also the lovely tutorials and details on HOW to use them!!! Priceless for us noobs with great taste but lack of knowledge and skills! I'm so excited to finally start delving into the digi world!!
Jenn Price
Post a Comment