Showing posts with label Amber Ink. Show all posts

Tuesday, August 30, 2011

i'm a SLOW runner! And Yay for Teresa!


A little late with this post, sorry. We were on the road and
computer-less for the last couple of days (not to mention
crazy like chickens with our heads cut off!)



I have the honour of passing the
orange torch today to the new Amber Ink Orange

Team member: the fabulous Teresa!


You can see all the gorgeous creations on
Teresa's blog Mama Pickle here
. Her style
is SO versatile and her work is so lovely!
&
You can read more about Teresa & all the new
Amber Ink Torchbearers here

(Gotta love the way Pam writes!)

And I wanted to say a Thank You ever so much, to Amber & Pam.
It was a joy & a thrill to work with you both and your gorgeous artwork.
You're lovelier than words can say. And last but not least,
thanks to my fellow torchbearers for the fab inspiration!


On a personal note, Boy, are we relieved and grateful chez nous. Even though I've messed up a fair bit blog-wise lately--which would normally be tragedy beyond measure ;). I can't help but feel that everything seems to be perfect now that C's Dad is out of the hospital and out of danger. Of course, a scare like almost losing someone you love makes you realize how blessed you are to have your loved ones & to be lucky enough to love them so stinkin' much you can hardly believe it!

Hope you are all safe and well and ever so happy.
Love,


Wednesday, August 24, 2011

One last Summer Fling? Polaroid box - beach diorama (template)

First, Congrats to 'kksb' on being the winning bidder in the
Blogs 4 Boobies auction. Thank You ever so much!

And thank You all, more than I can say, for your kind comments & bids. You are the sweetest blog buddies ever! Another big thanks to Heather at Skipping Stones Design for all of her hard work organizing it.


And since Polaroids seem to be taking the crafty world by storm, I
wondered if you might enjoy one last little summer fling
with this new template...

Amber Ink polaroid box

...a Polaroid Beach Box.


I can just imagine making a diorama of the family by cutting out
some photos of kiddies & having them playing on the beach...
or
adding sand or little shells & stuff as a vacation memento box...
or
putting a photo inside the lid of the box & putting treats in there...
or
making a little Polaroid scrapbook book for inside the box.


The box measures just over 3-1/4" square.

The box & lid are both printed on 140lb watercolour paper, so that the
thin Polaroid frame is not too flimsy for a diorama box:

beach dirorama Amber Ink

But you could put acetate inside the lid of the box, instead of leaving it open.

The clothesline was made this way:

Step 1) Cut a piece of thin silver wire-about 5 inches long.
Step 2) Cut the bottoms from 2 mini skewers/toothpicks (to get the right length.)
Step 3) Wrap the wire around the toothpicks (eye-ball distance between them by wrapping one & holding it to the box.)
Step 4) Adhere the clothes to the clothes line with a nice strong glue.

...and to add the clothesline to the box:

Step 1) Pierce 2 holes in the sides of the box at the height of the wire.
Step 2) Thread each end of the wire into the holes.
Step 3) Adhere the ends of the wire to the outside of the box.
Step 4) Add a wee dab of glue to the toothpicks bottoms to hold them in place.
Step 5) To hide the wire ends, stick some cardstock panels on the outside of the box.


The 'itsy bitsy teeny weeny' swimsuits are just
1/4 of an inch to 1/2 an inch high:

clothesline detail
(I'm obsessed with mini things lately)

I coloured retro patterns on them with Prismacolor
pencil crayons & then used an eraser to try
to make them look sun-faded.


They come from this cute
accessory digi set at Amber Ink:

Day At The Beach Clothes set

The photo I used is from WikiCommons here
(a great resource for photos etc. that are in the public domain)Detroit_Photographic_Company_(0361)
[Other public domain beach postcards available here]


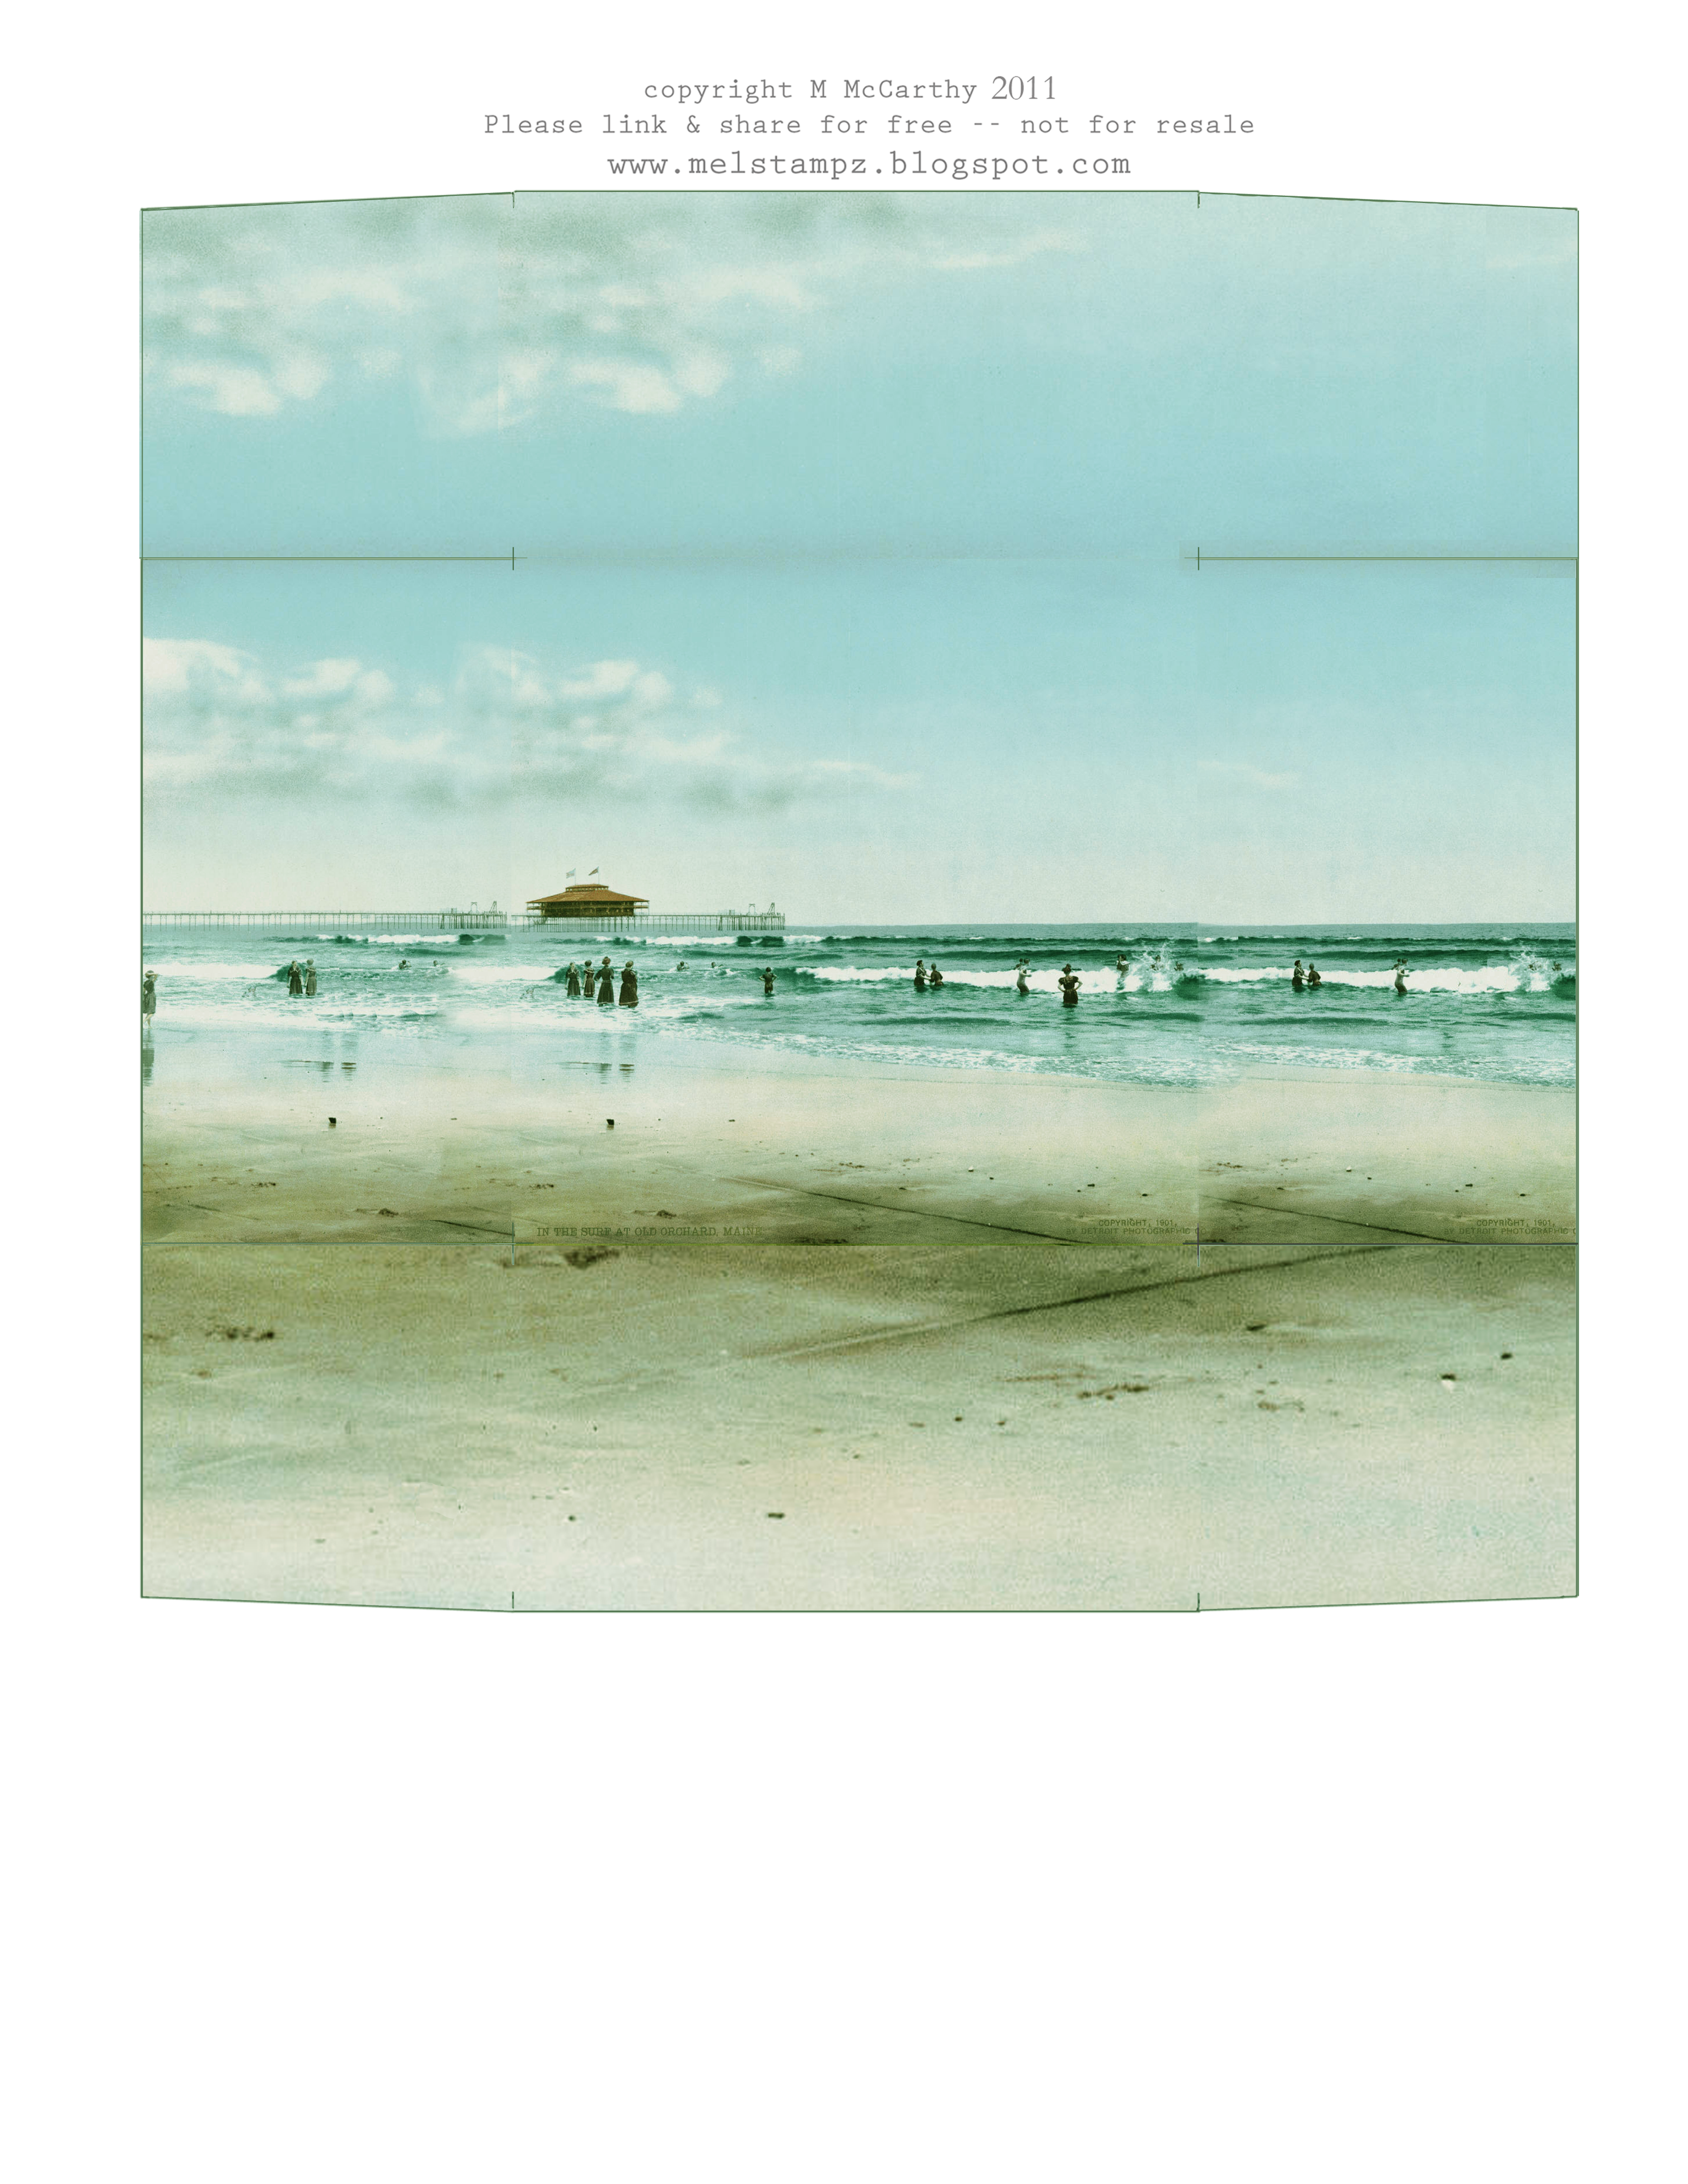
Polaroid Box BOTTOM:
(with the vintage beach postcard pasted &
primped & preened in Photoshop) ;)

Download the 'Polaroid Box BOTTOM'
as a PDF here on acrobat.com

or
To save this file:

In Firefox/Chrome: right click on the image & choose "save link as"
Explorer: right click on the image & choose "save target as"


or
you can find this Polaroid Box BOTTOM as a PNG on Flickr here


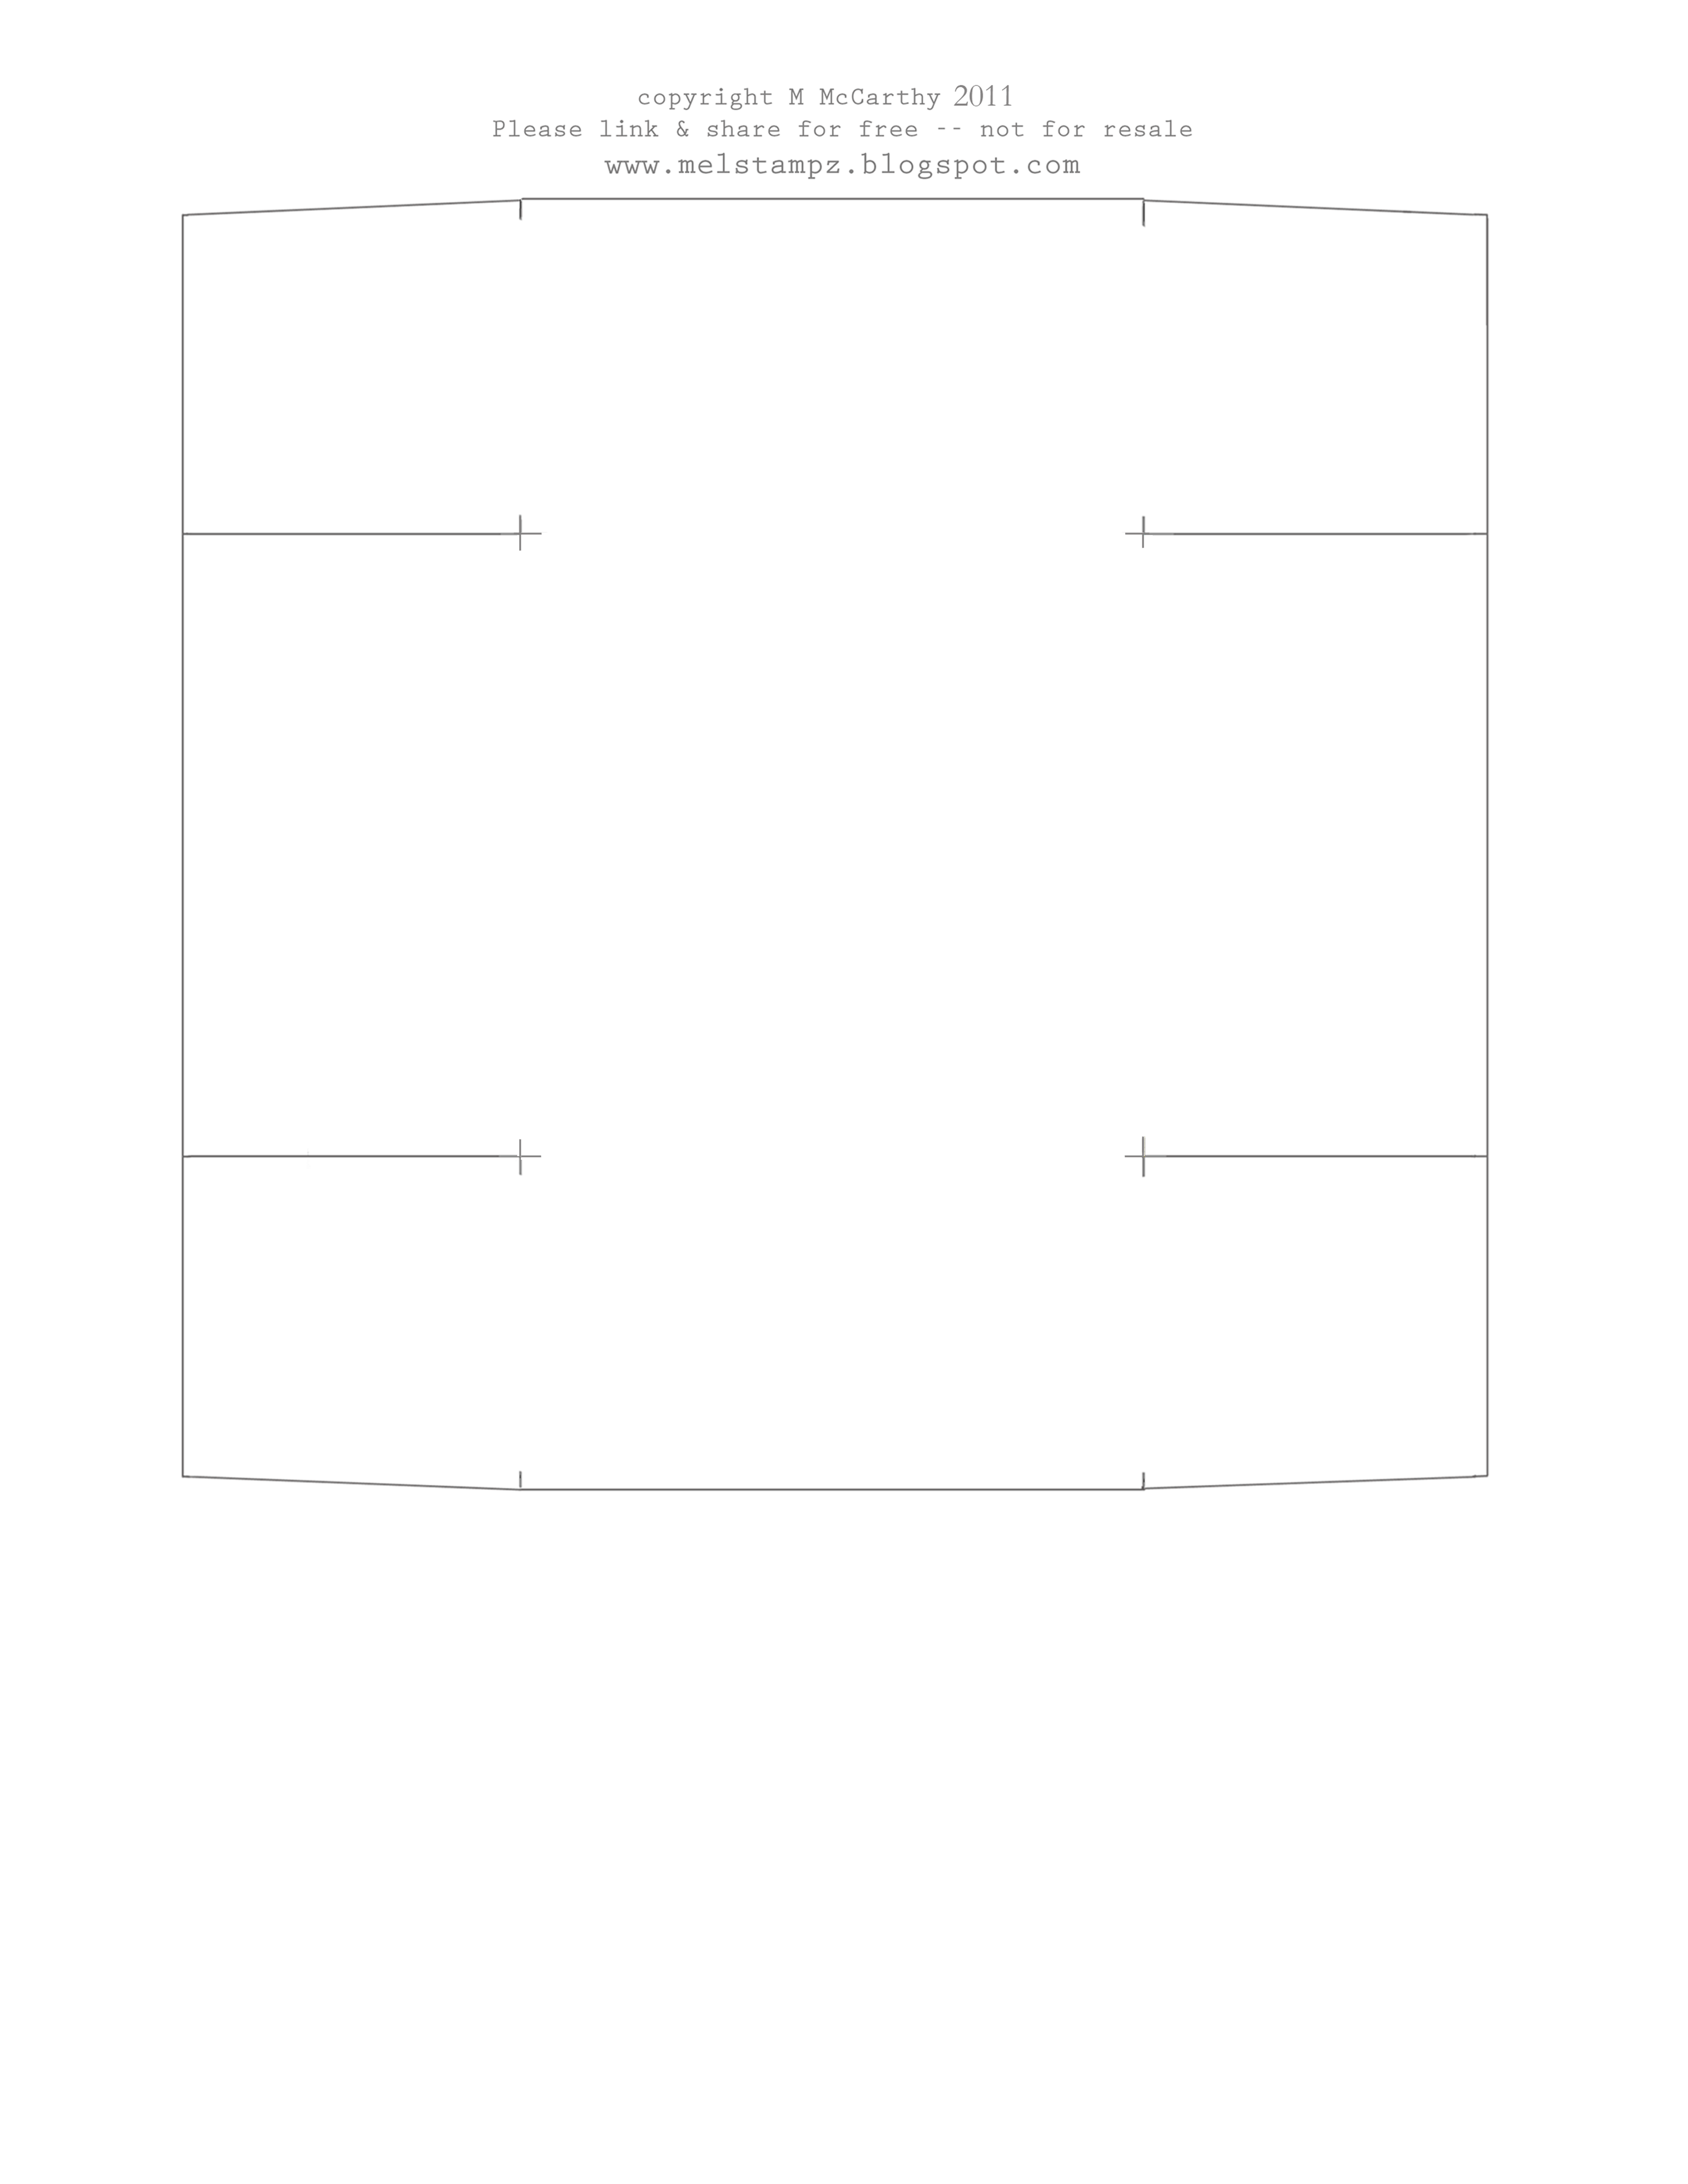
Polaroid Box LID:


Download 'Polaroid Box LID'
as a PDF here on acrobat.com

or
To save these files:

In Firefox/Chrome: right click on the image & choose "save link as"
Explorer: right click on the image & choose "save target as"


or
see Polaroid Box LID on Flickr here


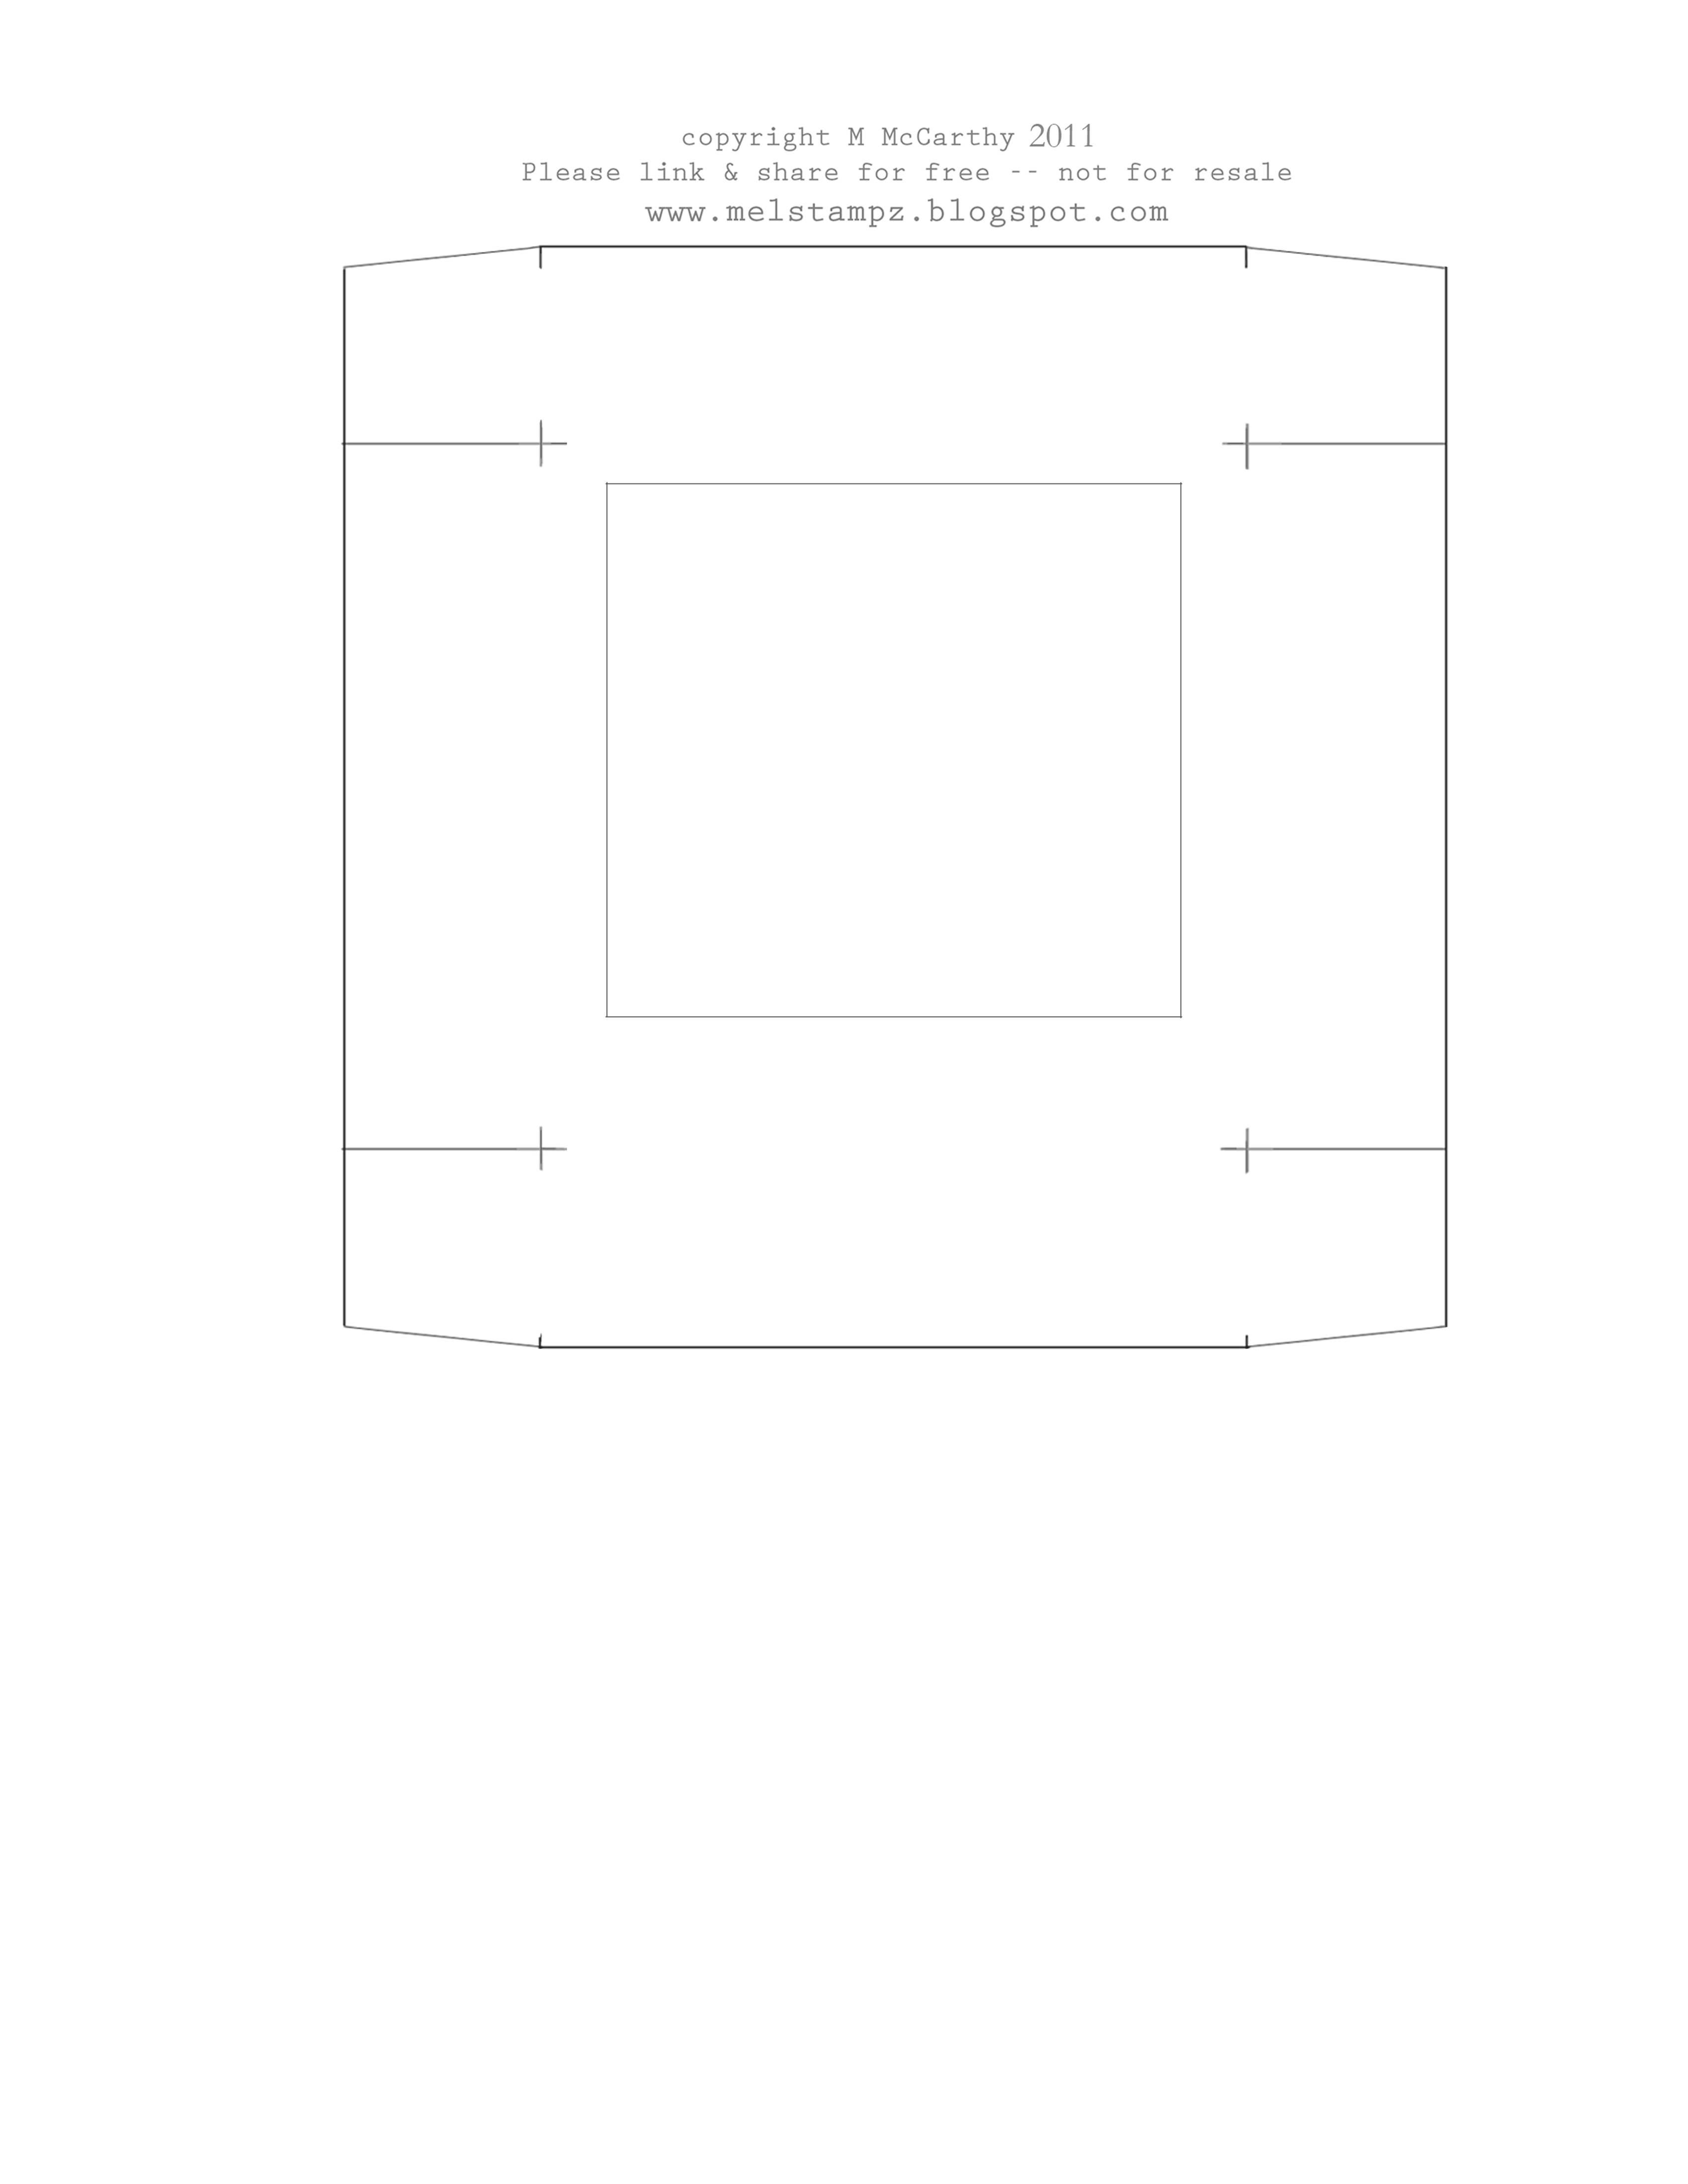
Polaroid Box BOTTOM:
(NO score lines-just tick marks to show where to score)Link
Download the 'Polaroid Box BOTTOM
(plain no score lines)'
as a PDF here on acrobat.com

or
To save these files:
In Firefox/Chrome: right click on the image & choose "save link as"
Explorer: right click on the image & choose "save target as"


orLinksee Polaroid Box BOTTOM plain
(no score lines)
on Flickr here


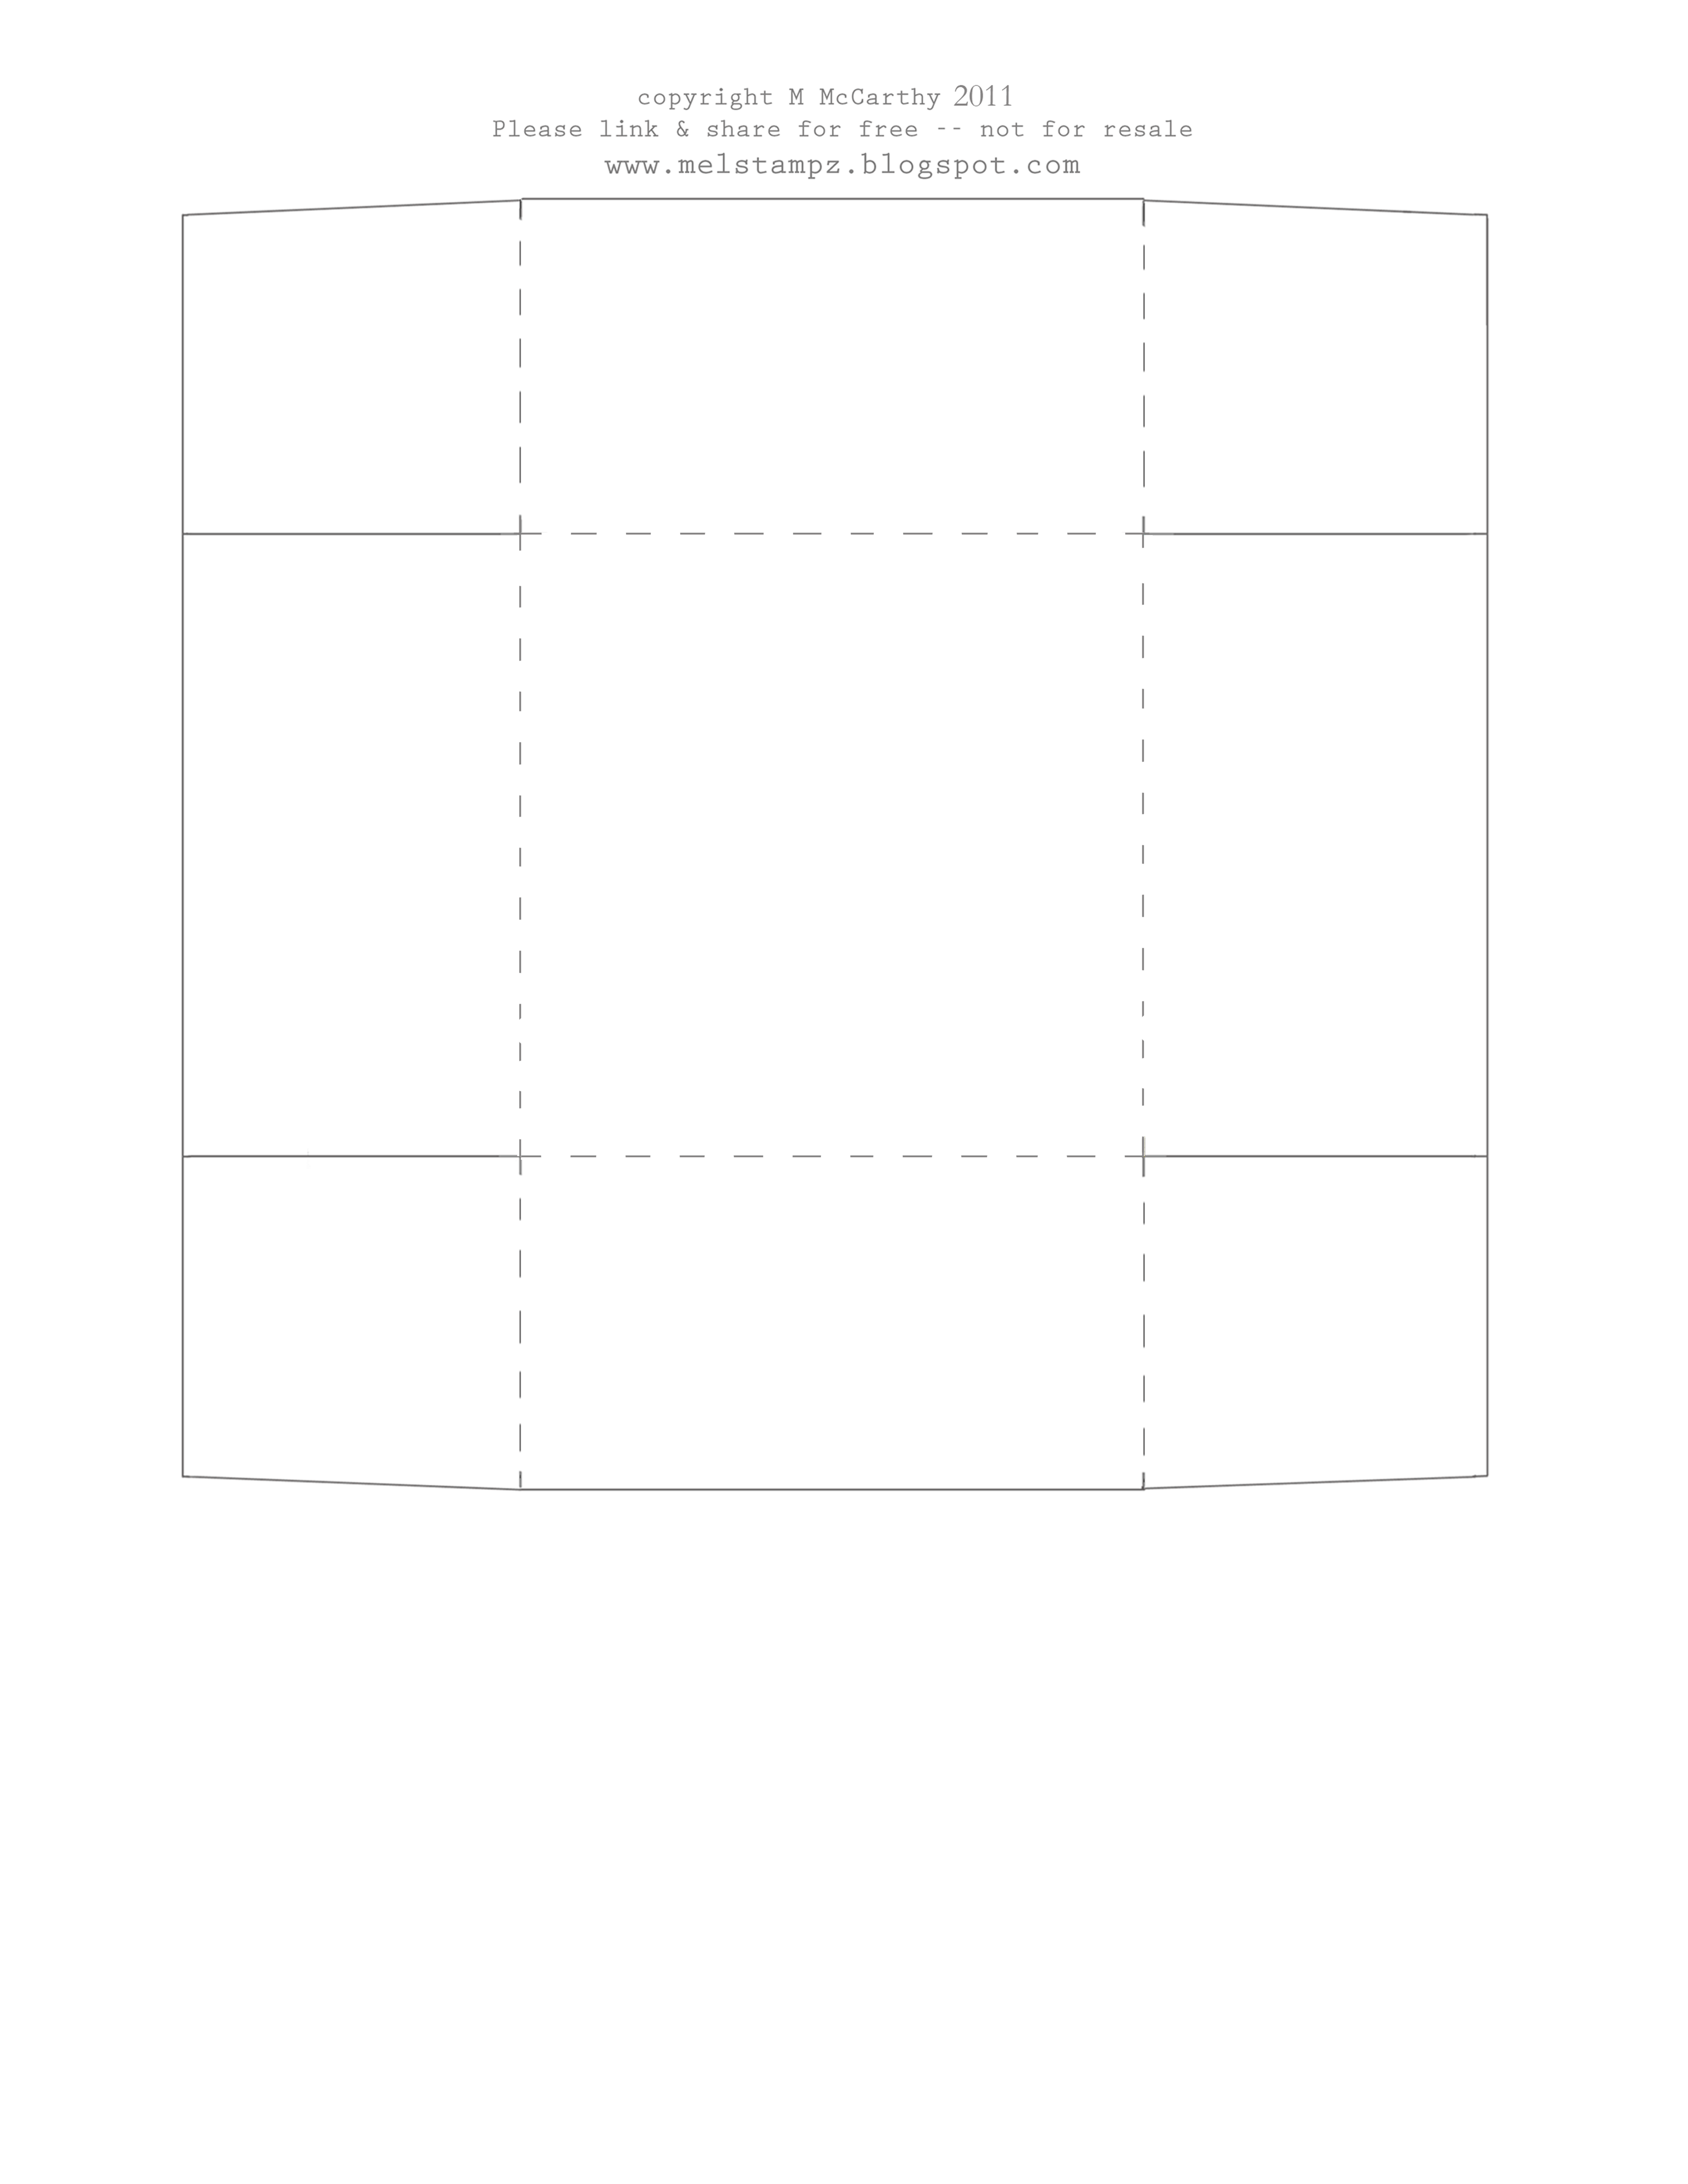
Polaroid Box BOTTOM:
(with score lines)
(left plain for your own photo)

Download 'Polaroid Box BOTTOM plain'
as a PDF here on acrobat.com

or
To save these files:
In Firefox/Chrome: right click on the image & choose "save link as"
Explorer: right click on the image & choose "save target as"


or
Add see Polaroid Box BOTTOM plain
(with scorelines here)
on Flickr here


Hope they're fun for You,

Tuesday, August 16, 2011

Ribbon Challenge!

Whoopsy! My applogies to those subscribers who got
a lot of coded gobbledy-gook in the last newsletter.
(It was an html fiasco, but it was for a very good cause.)


Here's my take on it:

Amber Ink Ribbon Challenge card-mel stampz


(Didn't realize how much I'd like
layering the different digi stamps
to make this scene. Loads!)


(get more bang for your digital paper dollar)

You can alter coloured digi papers
then print them on coloured cardstock:

Amber Ink Perfect Package ipaper desaturated on grey

This was
ipaper Perfect Package Wrap

Pink: Tiny

It was altered this way:

1) Desaturate it & make it lighter (PS how to here).
2) Print it on dark grey cardstock

(You don't have to stick to grey, of course.
You can print on any colour,
but if your digi paper imagery is light gray it will
give you a monochromatic look on almost any hue.)


The challenge is to use the sketch
and add ribbon.

I added a teensy bit of real ribbon
& some quilled-paper faux ribbon rolls:

paper ribbon rolls

Making little mini rolls of ribbon out of paper a hoot & easy!
(I have a tutorial in the works for them, in case you're curious).

Hope you can add your card to the challenge,
or just check out the gorgeous examples here:

(The challenge goes until Aug 22/2011)


Here's hoping your day is shaping up
to be a beautiful one!

Saturday, August 13, 2011

Turning a line art image into a silhouette (digital or stamped image)


Today a whack of pictures with the teeny details
of these 2 Amber Ink Hostess with the Mostest cards...
&
...a general how-to for turning line art
(digital or stamped) into silhouettes.

Card #1...

Amber Ink Hostess silhouette sq_mel stampz
(for this one, I hand cut the silhouette & adhered it to watercolour paper)

& Card #2...

Amber Ink Hostess as silhouette_mel stampz
(for this one I just printed the silhouette & cut with an oval cutter)

The silhouettes are an Amber Ink line art image that
I filled in PhotoShop to get a silhouette:

mini invite & envelope & sihouette detail Amber Ink Hostess

They're embellished with mini things like this
teeny tiny dinner invitation with a folded mini envelope
(made with paper, thread & printed text bits).

Here are the insides of the 2 cards:

insides

The square card says "What's Cookin' Good Lookin?" inside.

The tall card has this little salad bowl in it
(which is also part of the Hostess with the Mostest set):

Amber Ink salad bowl silhouette inside card
(It got the same silhouette treatment as the hostess.)

They both have matching envelopes:

One paper envelope:

(how to line any envelope quickly here).

And one upcycled organza bag:

organza envelope
(It used to have silk undies in it! *giggle*)

I stuck a mini tea towel & recipe card on the
organza envelope to hide the company logo:


teeny recipe card & tea towel

The tea towel was made by printing a small section of
this ipaper onto Sticky Back Canvas and
wrapping it around a bit of cardstock & fraying the ends

The recipe card was made by printing a part of a recipe
sized to a 2 point font & cutting it out to measure
just under 1" x 3/4"


1... details: DIY mini card embellishments
2... the image Hostest with the Mostest from Amber Ink
3... how to make a line art image into a silhouettes (plain & patterned)

-1-


Some mini things made of paper:

mini pencil-recipe card & book

To make the mini pencil out of paper,
I rolled it like a paper bead.

Here's how:
  1. Cut a wee scrap of patterned paper about 1 inch by 1/2 an inch.
  2. Stick a teeny bit of double-sided tape on one side of it.
  3. Roll the paper on a needle (adhering the paper to itself).
  4. Slide the paper off of the needle.
  5. Then cut the tip of the rolled paper with scissors to shape it into a point like a lead.
  6. Draw on details (the pencil lead & the eraser) on with black and silver pens.
The recipe card is identiacl to the one on the
organza envelope above (again, 2 point font).

mini recipe book pages side view

To make the book, I cut & folded some tiny little pieces of paper
(patterned and copy paper) and doodled on them.

stitching & thread on mini recipe book

...then stitched the pages together & wrapped some turquoise thread
around the cover and pasted on a tiny printed label.

-2-

(in digital or stamps)

This Amber Ink set is called
Hostess with the Mostest:

I used the digital version:


...but they also have


Do you prefer stamping?

You can find the stamps here.


I also used these 2 digi papers:

ipaper Schoolgirl Plaid


& Swiss Dots Sunny Yellow tiny


My printer a Canon MP240 prints colours funnily,
so I added green to these papers (+100 green)
before printing.

-3-

...create silhouettes from line art images:

DIGITAL SILHOUETTE:

Open the silhouette in Photoshop
(or other digital software that is
capable of filling images with solid colour.)

Fill all the areas of the line art image
Then print it & use your image:

amber ink Hostess use paint bucket to fill Black 78%

This digital fill is how I did the ones I used on the cards above
(but not with a deep black. I like using black at 80% to get a silhouette
that reads as dark, but still shows some of the line art of the image.)

You can even get a funky patterned silhouette:

fill with pattern for a digital silhouette

Simply fill the image with a pattern
(Please see this tutorial post if you'd like
to see how pattern filling works).


STAMPED SILHOUETTE:

Stamp the image & then simply colour it in:

stamp & colour silhouette

To create a patterned stamped silhouette:

Amber Ink Hostess_magic pattern silhouette

Stamp the line art image, then stamp & heat emboss a pattern over it
(with clear embossing powder) then colour it in.

...and here are the cards again:


measurements:
square card: 4 1/2" wide x 5" tall
tall card: 3 1/2" wide x 6 3/8" tall


Thanks for having a look.
Hope you & yours are doing well,