


ETA:Sorry guys, haven't been well enough to post. Migraines. Hoping it'll let up so I can post tonight. Hugs, mel
ETA: taking a sick day (Sunday)
ETA: taking a sick day (Sunday)

I'm SOOOOOOOOoooh excited about somethin' to give all of you for Christmas (or for just plain fun for all of you who don't celebrate Christmas...) I'm going to try and post a new template every single day for a month! Here's the first one: a tall skinny box. :O)
Are you guys are tired of this card/look by now? Hope not, 'cause there are a couple-few details that were out of the norm for me that I wanted to share with ya. This card was a fun one to make because of its curvy shape, but also because of the stitching (which is double-sided because it shows on the front & back of the card instead of having to be under layers of mats.) The ends of the thread are hidden under the dragonflies.
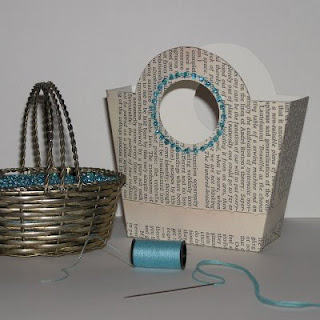
Of course, if you don't do sewing, you can skip that part & just make the box...if you like. :O)


It is originally from SU but I could not get their PDF to print fully at all & I didn't want all the score lines to show, so I messed around to resize it & remove the lines. When finished, it measures a lil' over 1 inch by 5.5 inches.
Ways to dress the box up, before assembling it...
1) Create liners for the flaps by tracing them onto text paper (text available in jpg here.)
2) Pierce & stitch the flap liners with turquoise thread (ends are hidden on the back of the liners)
3) Pierce & stitch a trail for the dragonfly
4) Create the curvy bit at the bottom (With the same curve as the card. Details & template here)

The flower stamp is called Victorian Single Flower. It's stamped on Basic Grey's Recess paper & this is my favourite way to colour it...


Silhouette Colouring: A) Emboss in black B) Outline in black marker C) Fill

This is the back of the card.
Here's how to get the stitching to show on the back too:
(with no messy knots)

Step 1) Pierce where you'd like the stitching to be

Step 2) Place dragonflies where you like for your design (they'll hide the stitching ends...see that little turquoise mess of threads on the very right of that pic up there?) :O)

Step 3) Adhere the ends of the thread on the front of the card where you had decided your dragonflies (or other image) would go.
Step 4) Stitch away
Step 5) Stick your dragonflies on. These ones have lots o' bling since they're painted with Shimmerz ("Angel Wings") and the gems are Swarovski crystals, shiiiiinnnny! ;O)
For how to make the dragonflies click its picture...
(same for the box & flower)
(same for the box & flower)


Thank you for stopping in!
Happy belated Thanksgiving to anyone who is in the U.S. of A. (I missed my Canadian one bein' sick too. How lame am I?)
Happy Craftin!
:O)
Mel


33 comments:
Huge Hugs - with extreme thanks!!!
Gorgeous project!!
Beautiful!! I love the stitching!
woohoo! A template every day! I'm so excited! Your projects are always wonderful!
Mel! A template every day! Your are so very kind! Really really amazed of you and so blessed that I can see your art work and even try it too! Thank you so much for everything you do for us!
Your project is gorgeous! And your stitching is so pretty!
This is totally awesome. You are so kind to share all this information and in such detail. Your talent is a joy to behold. Thank you for sharing it!!
Thanks for the template. Just in the nick of time.
Mel, your crafting brain is definitely the size of a planet. :)
Thank you for "Template's Month" and for all the detailed explanations on your cards. The tall box comes at a perfect time, I needed an idea for a other than card blog challenge. Now I know what I'll be making. :)
Hope your nasty flu-visitor has flown...
Many hugs,
Mada
Wonderful as alway Mel. Thanx for the template to play with.
Enjoy your day off, and I'll look forward to "A template A day", (WOW!!! Thank of you)
Wow Mel, a template every day - that's fantastic!! Thanks so much. I love the projects in this post and it has given me an idea for a Christmas gift. Thanks again. Hugz Libby :)
Absolutely gorgeous!!!
I love EVERYTHING you do with the text paper! Okay... I love everything you DO!! It is such a pleasure to check out your site every day. Thank you so much!
Swedie
Mel you work is just stunning. You are so talented. I have nominated you for an award that I received as well. You can check out my blog for details. You Deserve it, with all the talent you share with us...
Thank-you
I just love these creations with all the mixed media elements...and those flower stamps rock!
Wowzers, this set is gorgeous! The colours, the newsprint, the dragonflies--all gorgeous!
FABULOUS!!!
Fantastic projects and thanks for all your templates and information.
Girlie Girl this is drop down gorgeous! This is not paper craft, this is serious artwork! Your stitching and colors close the deal. Awesome! Best, Curt
hola!le pienso mucho para contestar por la barrera del idioma,soy sinceramente malisima para el ingles!soy martha de méxico y todos los dias paso a tu blog y me encanta ver tus creaciones y los tutoriales que con tanto cariño y dedicación subes!te admiro por eso!!saludo desde méxico!
What a great template! Thanks for the inspiration.
You are the QUEEN of templates!! Love em all.
This one is also amazing!
I nominated you for a Kreative Blogger award! Check out my blog for details!
~Jackie
Wow, Mel! A template each day! That's so awesome of you! You are the sweetest!!
I'm sorry you are still not feeling well! I hope that migraine goes away soon. . . .like now!
Your dragonfly card is. . .GORGEOUS! I love how you use the dictionary prints to the backside! Such an elegant card!!! Your stichings are out of this world too!
What an exquisite set! Thanks so mauch for sharing the details! You truly are an inspiration! The stitching is fantastic!
This is beautiful! Love the colours and all details. So great with the stitching! :) Hugs, Hege
The perfect set for that special friend! So creative and just gorgeous too!
Great project. Thanks for posting. I read your blog daily. Love your stuff.
Sure hope you feel better soon!
Fantastic work again Mel!!! I love stopping by to see what you have created and have left an award for you over at my blog so be sure to stop by :)
Aga xx
Tell that headache to go away and not to bug my friend. May be your brain is telling you to slow down.
Love the creations here. Especially the blue on the vintage papers.
What is that on your nose in the pic. Is that a maple seed?
Love those dragonflies - oh - the whole dang project is amazing Mel! --absolutely fabulous!
I hope you are feeling better now Mel! Love the long box!
Mel, wow, these projects are just fantastic. I don't know how you do it. Hope you are feeling better.
Wow! That looks great!
Happy blogoversary!
looks absolutely marvellous! I was away for quite sometime, and i was missing your blog the most!!!
Post a Comment