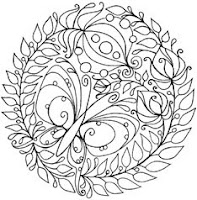
Kinda Snifty, maybe? well it was mighty S'mugly! See......

This is that loverly stamp from Paper Garden Projects. I know... you're asking yourself "How is it possible to mess up something this pretty???" but I managed. ;o) I was not happy with a green that I added. It was some ugly!
If this happens to you, don't throw your sm'uglies away. Cut 'em up! :O) Cutting might seem time consuming, but images can take quite a while to make (especially when you try a new technique) so it seems worth the time to salvage that image, no? You get added definition to your project from the cut layers too. :O)
The Technique Summary: Solid glue pen emboss resist
This is emboss resist with a twist. It's a line image...which will have a clear outline & it'll be coloured inside with a dark resist background. (You can use a glue pen & clear embossing powder to protect your colouring):
Summary:
(details are described with the pictures)
The twist:
Step 1) Emboss the image in clear & Colour it however you like.
Step 2) Glue pen heat emboss over your colouring
Step 3) Double or Triple emboss it
The Resist:
Step 5) Cover image in black Craft ink
Step 6) Wipe excess ink off
Step 7) Reheat with heat gun to restore the glossiness
Makin' Smugly:
+emboss+clear+image+%26+colour+%26+gluepen+triple+emboss+over+colour.JPG)
The Twist. Create some Colour in a Clear Outline
Step 1) Emboss the image in clear & Colour however you like. I stamped the Image in Versamark & Embosed with clear embossing powder & coloured using SU markers on Watercolour paper blended with a Niji water brush.)
Step 2) Glue pen heat emboss over your colouring: Just scribble over your coloured area with a Sakura Quickie glue pen & while the glue is wet sprinkle clear embossing powder on it. Heat that with a heat gun.
Step 3) Double/Triple emboss it: While the Embossing Powder is hot, add another layer of E.P. & heat it up. Repeat layered clear embossing until it is solid
Create a Resist Effect:
+swipe+with+black+craft+ink+%28purer+black%29+notice+ducky+pants.JPG)
Step 5) Cover image in black ink
+wipe+off+excess+ink.JPG)
Step 6) Wipe excess ink off
+heat+EP+to+restore+gloss.JPG)
Step 7) reheat to restore the glossiness. Crackle the embossing if you like.
You know you wanna scream it out. "That is Some Ugly!" :O)
But don't let my colouring ruin it for you. The technique is fun, honest!
But don't let my colouring ruin it for you. The technique is fun, honest!
Salvaging Snifty:
+cut+bad+colouring+out+LOL.JPG)
Step 1) Cut the offending part of the image out.
This looks intricate, but since the cuts for this image are straight (just pointy leaves) it actually wasn't all that tricksy at all. I crackled the embossing to try and get more of an antique-y look.

Step 2) If you like you can add some holes for stitching (with a paper piercer)...

Step 3) Knot embroidery thread to make berries.

Step 4) and then the metamorphosis to what I hope is snifty...add a new Flutterby...


8 comments:
oh my! I could have NEVER imagine you did ALL this to make that round thingy! WOWSER!
wow it came out great and to think it was a sm'ugly not anymore LOL
Hugs
Norine
amazing how your mind works Mel!! fabo idea and job!! beautiful
um, there was no sm'ugly at all! I think (thought) is was beautimous to begin with!
Hugs,
Joani
We are all our worst critics! LOL!! I really liked the green on the original butterfly but like the work you did to make it more to your liking as well.
Wow! What a cool technique! Thank you for sharing, Mel!
Oh my gosh what a fantastic embossing technique. You come up with such awesome ideas, Mel! I just love the stunning colors to the butterfly and the 3D look to it. It's so pretty agains the back. You have such fantastic ideas!
I feel the same way about my mess up! Although I didn't see any on yours, the green is pretty. I try to salvage my screw up in any way I can. LOL! I hate the idea of wasting my time on a project I already started creating . . LOL!
Maria
OMG! This is beautiful! You are amazing!
Post a Comment