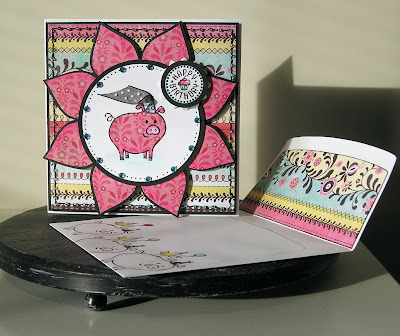
This Farmyard friends kit is just too cute for me to stop playing with. Gotta love this little piggy and all her possibilities. Here, she's living out a fantasty and glamming it up as the princess of

1...make a layered flower mat (without die cuts)
2...paper-piece a piggy
3...make a be ribboned princess hat
4...create a simple paper jig for spacing gems/brads

(All these come in the Paper Garden Projects Farm Friends Stamp Kit)
Stamps: Piggy (Designed by Pink Cat Studio) & round "Happy Birthday" sentiment
Wedding White Cardstock (to print out text patterned paper)
Raven Bazzill cardstock (black textured)
Basic Grey Urban Prairie Paper: Petticoat
Other Materials:
(from your stash or Paper Garden Projects)
Tombow Monomulti
For the Piggy:
Black ink & clear embossing powder
Copic Markers: (BG-15 Aqua, & RV-11 Pink, Frost blue B00, & a colourless blender)
Optional extras:
Aqua gemstones
May Arts ribbon: Sheer dotted swiss Black
Lighter
Scissors
Black thread & needle
Clear seed beads
or click this picture for the JPG:
-1-
...make a layered flower mat:
Just because you may not have Nestabilities doesn't mean you can't have shapes! (Don't get me wrong, I luv my Nesties)...but not having them doesn't limit you to square mats on your cards.
Here's one way to make a shaped, layered mat:

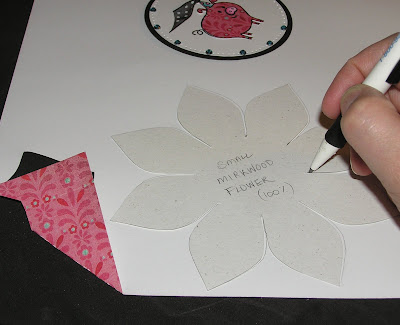
Step 1) Print or trace flower template on back of patterned paper or cardstock.

Step 2) Cut flower out.

Step 3) Adhere flower to black textured cardstock.

Step 4) Cut around (using the patterned paper flower as a guide) to make a black mat layer. If you're not comfortable cutting freehand, you could print the flower template using scaled printing just a bit bigger than the original.

Step 5) Cut black mat & patterned paper square:
For a 5 2/8 inch square card: the black mat measures 5 1/8 inch square (A circle is cut out of it using the gutting technique to save paper & reduce weight in the layers) The patterned paper measures 5 inches square

Step 6) Adhere the patterned paper to the black mat & pierce, if you like.
TIP: If sewing or faux-sewing, add adhesive where you won't hit it when you pierce holes around your square... I've had many a mucky needle from adhesive, LOL.

Step 7) Bead it if you like
-2-

Step 1) cut a circle & stamp just the curly tail on it.

Step 2) Stamp part of piggy on wedding white cardstock & cut out her snout & hat

Step 3) cut out and Colour the little snout & hat
and Stamp a whole piggy on the patterned paper

Step 4) Glue piggy to the circle & glue her nose on (if you are making a princess hat, wait until later to stick her hat on.) :O)
-3-
make a piglet princess hat:

Step 1) Pierce hole at top of piggy's hat
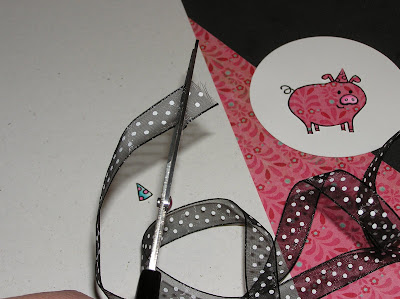
Step 2) prepare ribbon:


A) Cut ribbon (to 3 inches) with ends on an angle, and B) gently singe both ends of ribbon with a lighter to melt (makes it easy to put through the hole)

Step 3) Thread ribbon through hole at top of hat. Adjust length to please (trim if needed)

Step 4) trim end of ribbon at back of image

Step 5) adhere end of ribbon at back of image

Step 6) Add a little dot of adhesive behind dot on ribbon (let dry a little)

Step 7) Position ribbon & Hold down until adhesive sets

Step 8) Glue hat on (trim top of hat if needed)
-4-

Step 1) Cut circle of black textured cs for mat

Step 2) Adhere glam piggy onto the black mat

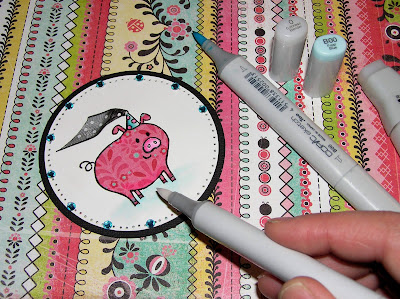
Step 3) Use a small piece of paper to make a homemade paper jig for spacing gems or brads

Step 4) Repeat, moving the jig & adding gems

Step 5) Pierce around image between gems (pins in fun foam hold it steady)

Step 6) Add a shadow to ground image (this is Frost blue B00, softened with a colourless blender)
The round sentiment is from the Farmyard Friends kit too.
Gotta love the teeny cupcake on it!
P.S. Here's a matching envelope tutorial:


17 comments:
I like this card!!! It's nice!
Love the card and just too creative as always, lady! Awesome tut!!
Thank you for the how to for the shaped layer. Would never have thought of that. Now I have to figure out where I'll use the flower I printed out.
So cute! Thanks for showing and explaining all the steps. Thanks for the template too!
This card is fantastic! I love the paper pieced little piggy and her awesome hat!
Thank you for sharing the templates and tutorial, Mel!
Very cute piggy idea!
Swedie
First off, I have to tell you I love how you are organizing your posts! I love all the detail you are giving. That little piggy hat and the paper piercing and crystals around the circle are GREAT!
Thanks Mel, that is different. I save your downloads with by Mel on the end so I know who I got them from, I have a few unidentified ones, and some come with clues built into the name which is very helpful. Just a thought.
As for cutting freehand - nah, can't cut at all well. So it will be resizing for me.
Cazzy x
As always, your tutorials are so thoroughly detailed even I can follow them. It's like I'm in a class with you all by myself. I'm so happy when you include printable templates for those of us who don't have all the fancy gadgets (yet). This is such a cute card, I laughed all the way through the steps. Thanks, as always, for sharing your wonderful talent and sense of humor -- oops, I'm on your home turf, so that be "humour."
Mel - I left a little something for you on my blog - you have an amazing talent and I thank you for sharing it with us!
SUPER cuteness! Thanks for the tute!
So cute! Thanks for showing us how to and the fab details.
i love it!!
You are just awesome!!! I love how you show us step by step directions! I come to your blog all the time to find inspiration!!! You are just Amazing!!! Thank you for all your creative inspiration!
Hey Mel! You're making that pig nervous saying "ham"! LOL! I love your cute piggie! You're so detailed. . even layering over the nose. I think a flowery nose is okay! LOL!
Wow, thanks for the template. I think I may just need to use it for my next project. I haven't created a flower shaped card for a while now!! Believe it or not, I have only two Nestie shapes. I've been avoiding buying everything because I have the Craft Robo and my husband gives me funny looks when I buy a die. He's like. .why did I get the Craft Robo? LOL!
Maria
Your card is awesome!!
I love your attention to the details.
Your directions are the best.
thank you for sharing.
Just plain beautiful ! Its such a wow card and you have explained it in such detail. Wow!
Post a Comment