


First things first,
Happy Birthday to You Jess!
and it took a while to finish everything, but here's that silly circus box tutorial.
Happy Birthday to You Jess!
Jessica is an amazingly talented stamper and devoted blogger (on much more than one blog!) and an organizer and blog buddy extraordinaire. It makes me so happy to know her! Happy birthday Jess!!!
and it took a while to finish everything, but here's that silly circus box tutorial.

& you can click
the back button to return here.) :O)
This circus used to be an old "personal library" box with a clear
plastic lid that slides open...
plastic lid that slides open...

and here it is without the lid on...


1...prep & line the box (& circus text file)
2...Cheap tricks: emboss digital images (on Coredinations Whitewash!)
3...(scenting your crafts)
4...how to make the magic pattern tent
5...digital freebie (giraffes)
This was for the Cuttlebug Challenge Blog
Here's the challenge link
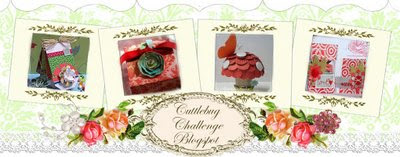
(#41 altered projects or re-purposed objects)
-1-

...prep & line the box


- any wooden or other box you like
- Coredinations cardstock (this uses Whitewash & Super Assortments ROY G. BIV)
- Patterned paper (I used Basic Grey's Gypsy/Romany-Hippie GYP-539)
- White cardstock
- Embossing folders/plates (Provocraft Textile Texture folder & a homemade cloud embossing plate)
- Sanding block
- Tombow Monomulti-or your favourite adhesive
- Optional: text file with circus story (and printer)
+Paint+a+box+or+use+as+is.+I+used+white+gesso-of+course%29+B%29+Add+Embossed+paper.+This+is+Cordinations+cardstock+%28a+blue+undertone+from+Whitewash%29+%26+a+green+%28white+core%29from+Super+Assortments.JPG)
Step 1} Prep the Box & line it:
A) Paint a box or use as is. I used white gesso-what else?)
B) Add Embossed paper:
The grass was made with a green Coredinations cardstock (with a white core) from Super Assortments ROY G. BIV embossed with the Provocraft Textile Texture folder, sanded & torn.
The sky is also Coredinations cardstock (from Whitewash Watering can WW500, which has a blue undertone.) Here's the stuff I did...
Step 1} The Coredinations was printed with a text file (I looked for a circus story online, but ended up typing one up. If you'd like to use it, please do)


Depending on your printer, the ink takes a bit to dry and is much better when heat set.
Step 2} The clouds were embossed with a homemade cereal box folder.
Step 3} Then, I sanded the clouds & the Whitewash cardstock edges.
Step 2} Adhere patterned paper (I cut out some flowers and stuck them along the sides)

Step 3} Cut & emboss lining pieces (this is white cardstock embossed with that Textile Textures Cuttlebug folder again.)

Step 4} Adhere white cardstock lining pieces-good ol' Tombow monomulti!
-2-

...emboss the digital images
(with Coredinations Whitewash)


...emboss the digital images
(with Coredinations Whitewash)

Digital Embossing: I was turning somersaults when I found out that Coredinations new Whitewash cardstock embossed out of a computer printer like a dream come true!
Copic markers have a really neat effect on it too (very similar to gesso without the mess) and of course it has all the properties of Coredinations trademark style...especially the colour that's revealed when you sand & tear it.
Traditional Stamping also works on Whitewash, of course, in case you just want to try the Copic effects on Whitewash (details about that effect below.) Please note: some colouring mediums may need heat setting or embossing to stay put.
- any Coredinations Whitewash cardstock (this uses Grandma's Rocker ww440)
- printer
- digital image
- clear embossing powder
- heat gun
- IMAGES used here: The sweet tent, lion, elephant, seal, rainbow wig & snack images are all digital "Circus Stamps" by Zenware Designs (from My Grafico here.)
- Copic Markers

Step 1 A} Print images & Emboss or stamp them, if you prefer.(Circus images are from Zenware at My Grafico here)
The WAY cool part about printing on Whitewash Coredinations is that you can easily print & emboss on it!!! (Not your average paper.) I swear, I live for that process! (I haven't tried other Coredinations types, yet.)

Step 1 B} Just avoid overheating the paper, the way I did while I was trying to melt the embossing powder and not fully awake yet. Yup, I crawl outta bed and emboss digis, LOL. ;o)
If you do overheat it, just smells and the colour shows through-see that yellow splotch on the clown's balance ball? Weird, huh? The overheating must burn off the "whitewash"

Step 2 A} Colour the images... Have you ever seen anything cuter than this seal? Nuh-uh!

Step 2 B} Whitewash & Copics: the Whitewash Coredinations cardstock takes Copics in a very similar way that paper treated with gesso or metallic papers do:
- not soaking in for traditional colouring (which can saves ink)
- And lets you achieve stippled areas or brush strokes
- the key seems to be not overworking or too much colour gets pulled off
- fabulously, it lets you remove mistakes and...
- it lets you pull of colour if you're like me & forget to leave highlights

Please note that a little of the white(wash) may come off on Copics. However, I'm still delighted with the way my Copics work after abusing them heartily (and heck, the nibs are replaceable!) but I thought I'd let you know.
If you use other markers/mediums: some markers may need embossing on Whitewash Coredinations cardstock (especially Stampin' Up!) That can let you achieve some wicked sweet effects though!

Step 3A} Adhere the Circus Critters in their homes. I used dimensionals (foam tape)

Step 3B} Add layers, if you like. It was such fun layering these digital guys. They're designed really well--in that their tails are all drawn on the perfect way so you can cut & curl them a little. The rainbow wig (in that picture up there) is actually from one of the clowns, and I Don't know why but I couldn't resist layering it onto the lion!

Step 4} Reinforce pieces to adhere on the outside: if you like, you can add strength to small shapes with an extra layer of cardstock. That Coredinations is sturdy with one layer (80lb) but every bit helps, right?
-3-
(scenting your crafts)

When you open the circus box,
it smells like cotton candy!
This is my favourite par. :o) GRIN! I had some cotton candy perfume that seemed like the perfect scent for this little circus.
(scenting your crafts)

When you open the circus box,
it smells like cotton candy!
This is my favourite par. :o) GRIN! I had some cotton candy perfume that seemed like the perfect scent for this little circus.
Random Circus memory: The circus is perhaps one of these most olfactory places in our memories. I know for me, the smell of cotton candy evokes my favourite childhood carnival memory of holding out my hand for change from a snack & getting my fortune read. (The woman told me the freckle on my palm meant I'd be famous) heehee. :O)
If you're going to scent your project, it might be a good idea to test the brand of perfume you're using to make sure the oils in it won't wreck your work. This one was okay. It's from La Senza; it's called Beauty Rush "Candy Baby" (not sure if they still sell it.)

-4-Now I just need a popcorn perfume... harhar

Isn't that Zenware digi popcorn stamp too perfect?
I could eat it up!
I could eat it up!
...make the magic pattern tent:

Raising the roof at the circus, heehee.
This tent was one piece (an image included in the Zenware digital Cricus Stamps), but I wanted the roof to be sticky-outy. I printed it larger that the critters on lined Basic Grey paper (Gypsy/Romany line) & did emboss resist.
The trick was to get the black lines to emboss before stamping the "magic pattern" on top (clear embossed background layer.) It does requires a step or two to get colour to stay on the gel medium. (It may be a good idea to use a spare mucky colourless blender for this):
1) Coat the patterned paper in gel medium to make it emboss on the really porous basic grey paper. Might sound pesky, but it is actually super speedy.
2) Print digital image & heat emboss it in clear embossing powder.
3) Stamp a background on & emboss in clear.
4) Rub the gel medium away with a colourless blender. (Embossing may feel sticky, but it will cure/dry fairly quickly.)
5) Colour with markers & wipe off the excess
6) Heat embossing powder again (to make the pattern show up more & restore shine)
Optional alternative: If you want a matte/non-glossy look, you can gently sand the embossing powder.)

If anyone is interested in a more thorough tutorial
for this technique, please let me know? :O)
for this technique, please let me know? :O)
(P.S. those 2 squirrel buddies are rubber stamps from
the retired Hip Hip Hooray Stampin Up! set)
-5-

giraffe freebies

Click here to download giraffe PDFs on SCS
(or click these pictures for the PNG versions)
.png)


More close ups of the characters in this box
are in this post here:


Hope this was half as much fun for you
as it was for me!
as it was for me!

P.S. I bought the Circus Stamps digital set at My Grafico here, but you can also see all of Jen's gorgeous Zenware Designs in one place here (either way, you buy em though My Grafico) :O)
P.P.S. no post until Friday.
(This kookie clown will be juggling some schtuff) ;o)


17 comments:
Good grieve Mel, what a lot of work, you will never seize to amaze me. This is truly amazing.........Baukje
Oh my gosh, that is seriously too cute for words!!! LOVE IT!
Mel this is adorable what fun making it and for the person who receives it. Wow you are amazing.
Mel this is just gorgeous. So perfect for a little one. I never think to 'think outside the box' lol! You have made me want to look harder for interesting items I could do something with. And something like that would be perfect for my little girl. Thanks for sharing your amazing talent and creativity
This blows my tired mind. I love the colours, details. I love it all! It is so darn fun to look at.
You are a true creative genius! I need to suck some of it out of your brain to put into mine.
This is amazing! My girls new room is circus themed so I either a.) can never show them this LOL or b.) even better-I MIGHT (shudders) have to try it!
And thank you my sweet friend for the bday wishes-that made my day! HUGS!!!!
You are a goddess...I am going to run out of glowing compliments soon. Maybe I will just have to go the other way and start dissing your talent instead!
I saw your post on Cuttlebug Challenge blog and had to stop by to tell you that this is SO cute!!!
You certainly put a lot of work in your creations. Your coloring is amazing. I love it!
Amazings! All the images are so cute and colourful, I love your giraffe!!!! But Mel, the smell of cotton candy is awesome, the smell of popcorn is awesome, but the smell of them together?... authentic circus smell but not so awesome! LOL
Wow, after seeing this, you so need a break, take till Saturday. LOL
Hugs, Fred
You completely blew me away with this project and tutorial! Amazing, Mel!!!
Hey Mel,
I love that you even scented your box to finish it off!! That's awesome!! I wanted to let you know since you mentioned "needing" a popcorn scent that I found a website a while ago that has all kinds of scents for cards and such. It's www.pinkpaperystudios.com Just thought I'd let you know!!
Wow, its stunning, cant imagine how long it took to make but well worth it!
Clairex
Wow! Mel you are amazing crafter! Thank you so much for all your hard work and sharing this AWESOME tutorial!
OH MY That is amazing! Can i come over to your house and just WATCH you craft?
Mel, this is out of the world amazing!! I have no idea how you come up with these things, I'm just so glad you do because they are gorgeous to admire!!
Mel, you're amazing. Nothing yours, which I did not like, but this circus is a lovely box. I envy your patience and your imagination. Bravo!
Post a Comment