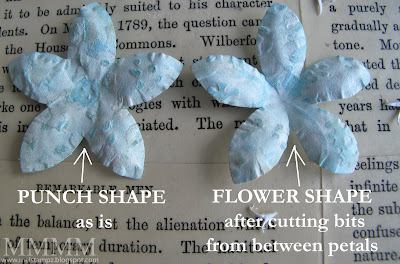
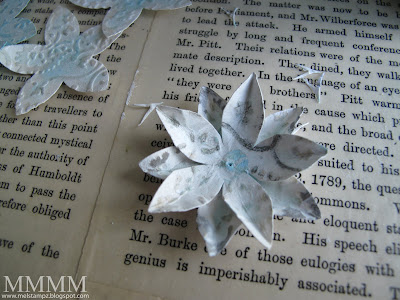
As I'm sure you know by now, I used a 5-petal flower punch for these flowers (glancing back at yesterday's post, I realize I must have said 'EK Success punch' a thousand times--how repeatedly! redundantly! repetitive! LOL.)
...BUT you can use these cutting styles with any flower punched, digitally cut, or die cut (or a flower doodle you've drawn & cut out) anything at all. And...If you're a beginner cutter, no worries: you'll see from my cuts that there's no need to have them perfect. (Isn't the shabby chic look liberating?)

snipping detail:

Cut 5 little 'V' shapes out from between petals.

Cutting into the middle of the flower makes it easier:

(See the gap to the left of the top petal of the flower above?)

Just snip in and then roughly cut out the center:

That cut gap bit is all hidden when you glue the flower together:

Add any center you like:

Here's the same flower in teal:


For a more graphic or stylized version,
you can create squared petals on a smaller flower center:

...by cutting off the 5 petal tips:

(super fast floweriness)
Then use the same cutting method, as used on
the 1st version above, to take out the center:

Snip a little ways into the middle and....

...cut away.
Glue the new smaller center you've cut
onto a bigger flower & add an embellishment:

This one has a wee button sewn on.
and happy Spring to those who don't. Here's hoping that your season
is filled with bright new possibilities & blessings!
please see this post...
Embossed fresco flower tutorial:
(embossing, colouring, painting...)


16 comments:
again a great tutorial Mel...I just have to play with my EK Success flower punch because it has 6 petals!
Happy easter and nice spring!
xxx Margreet
oh thanks so much - an easy thing to do but I had never thought of this and the results are gorgeous.
Ann xxx
thankey so much!!!
brilliant ideas!!!
hugs Sasha xx
What FAB flowers Mel, thanks for sharing your great ideas!
Keryn x
I just wuv you
xoxo
You are SO clever! Love your flowers! The aqua fresco ones are my favourites I think... but they are all lovely. Hey do you follow Beate Johns Blog? You should go take a look... she just did a video tutorial of a grunge rose. It's very lovely too and if you combine both techniques.. it would be AMAZING! I think you'd want to do the "fresco" on both sides on the punched flower. This also uses a 5 pedal flower to start with.
Here's the link: http://beate.blogs.splitcoaststampers.com/2010/03/27/grunge-flower/
Happy Easter & Spring! My DD is 21 and asked for an Easter Egg Hunt this year! I think I had as much fun hiding them and they had finding!
Beth Greco
your tutorials are awesome. super thanks. love them.
Happy Easter.
thanks for your time, creativity, .... you have such an 'eye' - the pictures in your tutorials are so beautifully done
Fun, fun, fun, and creative too! I have that punch and you've made me fall in love with it all over again!! Love all the possibilities!!
I am loving these paper flowers! Thank-you so much for sharing, I will definitely be giving this a try...
Hugs, Christina
Wow~ what a great ideas and tutorials. Thanks so much!
Love it! And don't think your working backgrounds don't get noticed. I'm always trying to read what's under your project. . .a dictionary, a history lesson, a novel. . . Way cool! I need to go to Goodwill and get me some good OLD books!
Happy Easter!
Thanks Mel great tutorial I love flowers !!! and laerning to make your own is so brilliant !
WOW!!!! This is stunning! Thank you so much for the tutorial! Keep on posting.
thank you thank you thank you!
Mel, as I said before...I am thrilled that I finally found your blog. There seems to be so many little tweaks for many different looks woowza! Great idea...and have a lovely day wherever you are!
These are cool, Mel. I know I can always find something new and creative at your site. Gonna go make an svg!
Laura
Post a Comment