


Do you ever feel like a card took you so long to make that it ought to be a gift?
But you feel like it's still only a card?
And you need to come up with a quick gift?
Well, this was a card ...
But you feel like it's still only a card?
And you need to come up with a quick gift?
Well, this was a card ...

who wanted to be a
gift-y notebook when she grew up
and she did:


(and it was quick & relatively easy
for those who like a teeny bit of stitching)

a...the image Strawberry Hearts from Tiffany Doodles
b...cheap tricks for changing up digital or stamped images
c...quick gift idea: how to turn any card into a notebook
d...details (bookmark, liner, digi paper water distressing & stitching ideas)
e...free digital papers (distressed pencil damask & strawberry definition)
Whew! It's been a while since I did one of these big old "pile-it-all-in-there-like-the-junk-drawer-of-creativity" posts. As you can see, this one has a little bit of everything.


Strawberry Hearts from Tiffany Doodles

Tiffany amazes me.
What a brilliant idea to have
strawberries as hearts!

The colouring is done with Copic Markers (most of them were scribbled onto an acrylic block & picked up with a Colourless blender to get a softer pastel effect with the colouring. You can get a lot of bang for your buck that way. More on the scribble and blend Copic technique in this pictorial).
Granted, scribbling & blending Copics does put more wear and tear on your Colourless blender marker, but if you buy a couple if them for spares it is still WAY cheaper than buying many extra marker colours.
You can even blend Copic colours by scribbling two on a block & picking them both up (like I did for the small berries here blending putty & light green on the Colourless blender marker tip to get a warm yellowy-green unripe berry colour for the tips of the small berries)


Tinting digital images to give a new look to them
Do you sometimes craft on autopilot & print or stamp in black only?
I do, but I thought sepia would be more fun than black for this
super sweet Strawberry Hearts image:

Somehow sepia just seems so much softer than black.
The tutorial in the last post this showed one way
to recolour your image (using Photoshop):

To get sepia, I just lightened as it shows in the pictorial above
& then made the image more red,
more yellow, and then a tad more green.
You can simply slide the scales around until you're
happy with it & you may want to text print
(Of course, for stamped images you could just stamp in a different coloured ink
seems like overstating the obvious,but I always forget and just stamp in black automatically)
You can also add texture by scratching the paper
gently to get lines in it. Like the scratched leaves here:

Hopefully you can see the lines scored into the leaves
(I upped the contrast of the photo)
The score lines are gently scratched into the paper using a paper piercing tool.
More on the paper scratching technique in this post.


for a speedy gift
Bonus: this doesn't take much in terms of supplies.

- a card (any size you like)
- copy paper (or text weight)
- something to punch holes (paper piercing tool, needle...)
- needle & thread and scissors
- glue to hide thread ends
- patterned paper to line the cover
Steps to stitch a quick notebook together:
Step 1) Make the inside pages of the notebook. Measure your card & cut some copy paper (text weight) to fit you card size. This was a 5 1/2 inch card, so the copy paper was cut to 5 1/4" x 10 1/2.
Step 2)Score the copy paper down the middle (or fold the pages if you have no score board)
Step 3) Easy fancy pants option: Cut curvy paper edges (freehand with scissors).
Step 4) Pierce holes along the card spine & notebook paper.
A) Lay the stack of folded copy paper on top of your card's inside
B) Align the paper to fit nicely in the card fold.
C) pierce holes with a paper piecing tool (or a needle/push pin/thumb tack). I pierced about a dozen holes.
TIP: Big stitches work well and make the job quick. There's no need to be all perfect with the stitching. Variation just adds to the homemade-ness, right?
Step 5) Stitch the spine. Thread a needle with whatever colour of thread you like. I doubled it up so the thread was 4 ply.
TIP: You can hide the thread ends: cut the thread and glue it along the spine of your notebook at the bottom & finish the top thread the same way.

If you are a very visual person, you may want to check out
my older post with a step-by-step pictorial of
how to make a stitched note book here.

Strawberry heart bookmark:

Made with some of the strawberries cut out and stuck to thread:

Step 1) Print & colour two strawberries from the Strawberry Hearts image.
To to create a mirror image of the berry, so that no matter which way the bookmark flips there would be a nice strawberry--in Photoshop:
A) Create a copy of the berry (draw a box around the strawberry and Use the copy hot key: hit control C)
B) Flip the image: use "rotate image horizontal"
C) Paste the strawberry you copied)
D) Print it, Colour it, & cut it
E) Add some clear lacquer glue if you want them shiny
F) Let the lacquer dry.

Step 2) Add a thread for the book mark. You could use embroidery thread for the page marker, but I wanted a colour that I only had in regular old sewing thread:
A) Thread a needle with green thread (or whatever colour you like.
B) Put the needle through the spine stitching at the top of the notebook (In this case, red stitches on this notebook).
C) Pull the needle so the thread is about half way through & tie it in a knot to keep it in place
D) Tie more knots along it to keep the thread together.

Step 3) Glue the strawberries to the thread end (one for the front and one for the back).

Step 4) Trim the thread end off

Like printing in black, another thing I tend to do on autopilot is stitching in straight lines around the image as a frame (circles or squares etc). Sew, I figured I'd shake it up a bit with...

How to add your own free-hand stitching:
A) Draw whatever you like in pencil
B) Pierce holes along the pencil lines
C) Erase the pencil lines
D) Stitch in the holes with needle & thread


A) Prepare so you can work quickly to allow the ink to stay wet: clear embossing powder & heat gun, a tray/folded paper to catch powder. Cut the vellum cardstock in half so it runs through the printer more quickly.
B) Type your sentiment in a font you like (leave extra space between words if you like for cutting)
C) Change the colour of the font
D) Print it on a high quality printer setting on vellum cardstock
E) Sprinkle clear embossing powder on the wet printer ink
F) Heat set the powder to melt it
G) Cut the words & stick them on

digital patterned papers
non-commercial use only, please
Two of the papers on the front
of the card are homemade digital papers:

-1-
The green-blue pattened paper was cut using a nestabilites
die (label that was trimmed. More on how to do that in this post).
I cut it in half and put a square in the middle to get a long shape for under the circle.
Want help downloading from Acrobat.com?
Please see this post for how-to.
This paper prints turquoise and green on my Canon MP24o,
but please feel free to adjust the colour.
I made this digi paper by...
...drawing a damask element
...scanning the element using it as a Photoshop brush to make a pattern,
...adding layers to the pattern with other homemade PS brushes and colouring it.
There's a tutorial here, in case you're curious how to make your own damask.


Here's hoping your day is bright and sunny,
even if only in spirit!

P.S. Life chat: Charles' knee is getting mo' better everyday, though it's still so difficult to see him in such a great deal of pain. He's been ever so strong and sweet. I still can't believe I almost lost him on the operating table! *SNIFF* Our hearts are filled with thoughts of the earthquake victims in Japan. Friends are headed there in a month, and we are on earthquake watch here in the Vancouver area. Scary since we and our friends live on the upper floors of Condos. ("Put your helmet on" ???? Squeak!) We're hopeful but heavyhearted for all those lives lost & the suffering.
Blog-ness: A couple few headaches trying to blog (literal with migraines & figurative) but lots of exciting changes: I've got a new computer. WooHoo-Fast! But we've spent the last few days changing Internet service providers to speed up a slow connection. And now we have to change again due to non-functioning wireless. Can't wait! Sunlight was great for photographing on and off this week, and I'll have more pics to post soon!
P.P.S. I'm not affiliated with any of these companies. Just me rambling about a few things.
Step 2)Score the copy paper down the middle (or fold the pages if you have no score board)
Step 3) Easy fancy pants option: Cut curvy paper edges (freehand with scissors).
Step 4) Pierce holes along the card spine & notebook paper.
A) Lay the stack of folded copy paper on top of your card's inside
B) Align the paper to fit nicely in the card fold.
C) pierce holes with a paper piecing tool (or a needle/push pin/thumb tack). I pierced about a dozen holes.
TIP: Big stitches work well and make the job quick. There's no need to be all perfect with the stitching. Variation just adds to the homemade-ness, right?
Step 5) Stitch the spine. Thread a needle with whatever colour of thread you like. I doubled it up so the thread was 4 ply.
TIP: You can hide the thread ends: cut the thread and glue it along the spine of your notebook at the bottom & finish the top thread the same way.

If you are a very visual person, you may want to check out
my older post with a step-by-step pictorial of
how to make a stitched note book here.


Strawberry heart bookmark:
Made with some of the strawberries cut out and stuck to thread:

Step 1) Print & colour two strawberries from the Strawberry Hearts image.
To to create a mirror image of the berry, so that no matter which way the bookmark flips there would be a nice strawberry--in Photoshop:
A) Create a copy of the berry (draw a box around the strawberry and Use the copy hot key: hit control C)
B) Flip the image: use "rotate image horizontal"
C) Paste the strawberry you copied)
D) Print it, Colour it, & cut it
E) Add some clear lacquer glue if you want them shiny
F) Let the lacquer dry.

Step 2) Add a thread for the book mark. You could use embroidery thread for the page marker, but I wanted a colour that I only had in regular old sewing thread:
A) Thread a needle with green thread (or whatever colour you like.
B) Put the needle through the spine stitching at the top of the notebook (In this case, red stitches on this notebook).
C) Pull the needle so the thread is about half way through & tie it in a knot to keep it in place
D) Tie more knots along it to keep the thread together.

Step 3) Glue the strawberries to the thread end (one for the front and one for the back).

Step 4) Trim the thread end off
...and there you have it--a dangling
page-marker for the notebook:
page-marker for the notebook:

Line the inside covers:
Just stick some patterned paper in there.
Just stick some patterned paper in there.
This is paper a digital freebie I made
(the download is linked below if you'd like to use it)
(the download is linked below if you'd like to use it)
distressing digital papers with water
(from an inkjet printer)
(from an inkjet printer)
Add a tiny bit of water on a damp brush can give you
an antique-y watermark look:

an antique-y watermark look:
The inkjet printer ink sort of bleeds like watercolour
& you can get interesting colour effects.
& you can get interesting colour effects.
Stitching with a bit of oomph:
Like printing in black, another thing I tend to do on autopilot is stitching in straight lines around the image as a frame (circles or squares etc). Sew, I figured I'd shake it up a bit with...
...a little love:
stitched "love" in cursive hand-writing.
How to add your own free-hand stitching:
A) Draw whatever you like in pencil
B) Pierce holes along the pencil lines
C) Erase the pencil lines
D) Stitch in the holes with needle & thread
I also added light blue knots for the flower centers
& more knots for the little 3D paper flowers.
& more knots for the little 3D paper flowers.
Then, some hugs & kisses:
"OXO" stitched with red thread

The "dear sweet friend" sentiment is made by
embossing from an inkjet printer on vellum cardstock:
embossing from an inkjet printer on vellum cardstock:
A) Prepare so you can work quickly to allow the ink to stay wet: clear embossing powder & heat gun, a tray/folded paper to catch powder. Cut the vellum cardstock in half so it runs through the printer more quickly.
B) Type your sentiment in a font you like (leave extra space between words if you like for cutting)
C) Change the colour of the font
D) Print it on a high quality printer setting on vellum cardstock
E) Sprinkle clear embossing powder on the wet printer ink
F) Heat set the powder to melt it
G) Cut the words & stick them on


digital patterned papers
non-commercial use only, please
Two of the papers on the front
of the card are homemade digital papers:

-1-
The green-blue pattened paper was cut using a nestabilites
die (label that was trimmed. More on how to do that in this post).
I cut it in half and put a square in the middle to get a long shape for under the circle.
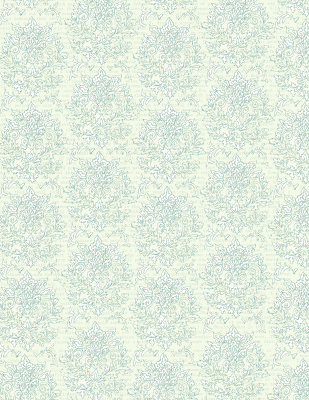
download: hand drawn pencil damask paper:

Want help downloading from Acrobat.com?
Please see this post for how-to.
This paper prints turquoise and green on my Canon MP24o,
but please feel free to adjust the colour.
I made this digi paper by...
...drawing a damask element
...scanning the element using it as a Photoshop brush to make a pattern,
...adding layers to the pattern with other homemade PS brushes and colouring it.
There's a tutorial here, in case you're curious how to make your own damask.
-2-
Strawberry snippet:
The strawberry definition is scanned
from an old dictionary, lightened, and tinted red.
from an old dictionary, lightened, and tinted red.
There are three versions of the strawberry paper:
(click the links to dio PNGs or
click the images & choose save as for JPGs)
-A-
download: red alphabetically correct
strawberry snippet

-B-
and another light red one but
with the strawberry definition at the top,
so the word "strawberry" will show on projects like this one:

-C-
a black & white (desaturated) version:

(Please feel free to tint the red one
to make it whatever colour you'd like).

for the card cover
Other Patterned Papers: Lined Digital piece (middle) from Two Peas Notebook Basics by Jen Martakis BasicGrey Wisteria (top flowery); 6x6 Basics 6x6 Manilla (bottom small lines) Embellishments: Hero Arts Lace ribbon, CTMH organza (both coloured with gray Copic marker); Clear button; Flowers made with an S.U. flower punch 3 for You; Crystal lacquer on the berries.
clickable blogger photos:
(click the links to dio PNGs or
click the images & choose save as for JPGs)
-A-
download: red alphabetically correct
strawberry snippet

-B-
and another light red one but
with the strawberry definition at the top,
so the word "strawberry" will show on projects like this one:

-C-
a black & white (desaturated) version:

(Please feel free to tint the red one
to make it whatever colour you'd like).
for the card cover
Other Patterned Papers: Lined Digital piece (middle) from Two Peas Notebook Basics by Jen Martakis BasicGrey Wisteria (top flowery); 6x6 Basics 6x6 Manilla (bottom small lines) Embellishments: Hero Arts Lace ribbon, CTMH organza (both coloured with gray Copic marker); Clear button; Flowers made with an S.U. flower punch 3 for You; Crystal lacquer on the berries.
clickable blogger photos:


Here's hoping your day is bright and sunny,
even if only in spirit!
P.S. Life chat: Charles' knee is getting mo' better everyday, though it's still so difficult to see him in such a great deal of pain. He's been ever so strong and sweet. I still can't believe I almost lost him on the operating table! *SNIFF* Our hearts are filled with thoughts of the earthquake victims in Japan. Friends are headed there in a month, and we are on earthquake watch here in the Vancouver area. Scary since we and our friends live on the upper floors of Condos. ("Put your helmet on" ???? Squeak!) We're hopeful but heavyhearted for all those lives lost & the suffering.
Blog-ness: A couple few headaches trying to blog (literal with migraines & figurative) but lots of exciting changes: I've got a new computer. WooHoo-Fast! But we've spent the last few days changing Internet service providers to speed up a slow connection. And now we have to change again due to non-functioning wireless. Can't wait! Sunlight was great for photographing on and off this week, and I'll have more pics to post soon!
P.P.S. I'm not affiliated with any of these companies. Just me rambling about a few things.


42 comments:
Beautiful project Mel - thanks for all the details. Love all the little touches and the recipient of your lovely gift will surely adore it.
This is incredibly gorgeous! I mean, wowza. Thank you for all the tops and tricks! Love the notebook idea. THank you!
Fabulous Mel designed project!! Love that mind of yours...ack! hehe
good to hear C is getting better, poor guy.
yippee new puter!! take care, stay safe... big hugs!!!
Oh how beautiful and what a wonderful idea!
Melissa, this is really sweet! there are so many little bitty details that keep catching my eye. I love the teeny flowers you have stitched on the front, and that sweet strawberry bookmarker is adorable! I think you made this card's dream come true beautifully!
Hey Mel! Congrats on the new computer, boo to switching providers constantly :( Gorgeous project. . .you always inspire and provide such amazing instruction!
I'm so sorry to hear that you're still fighting the migraine beast. Not much fun, I know.
I don't know how on earth you manage to be creative at the same time, but you sure rock! Thanks so much for all these fab ideas.
I love this notebook! You are so clever with your little details, a little stitching here, a bit of embossing there... and fabulous! Thank you for all the time you put into blogging every step along the way of making this 'berry' sweet notebook.
Thanks for all the details on your beautiful project. And for the nice freebies off course!
Wow this is beautiful, such attention to detail. I love it!
Thank you for all the work in this post. I appreciate the details. I admire your creativity.
Wow mel!! AMAZING attention to detail this is so inspiring! I am blown away by your talent!! I can't wait to try this!!! Thank you for making that digi look SO good!! =)
Mel -
This is so gorgeous! And what an awesome idea. I agree sometimes you spend days (or is that just me - LOL) working on a card and then you wish it was something more. Trust you my dear to come up with such a genius solution! I love your tutorials you always have so much detail it makes it easy to follow.
I'm so glad Charlie is on the mend. You take care of yourself, I know how nasty those migraines can be.
Elaine Allen
wonderful and thoughtful tutorial...the card notebook is so beautifully decorated! thank you so much for sharing so many useful frugal tips.
hugs, hugs...
heaney
Beautiful, Beautiful project! Love it! Thanks for the great tutorial.
OMG! It's gorgeous. Thanks.
GENIUS to make a card into a little notebook! But then I expected no less from you. :)
Oh my, this is just amazing.
Hugs
Tanya
Fabulous post Mel & what a great idea :)
Thanks for all your inspiration ( & the freebies too :) )
Hugs
Tracey
xx
Tradução do português para inglês
Congratulations for your work.
He is charming!
Wow. Whew. Wonderful lengthy and detailed posts. I love that about you. You da bomb. My guess is that it puts a week to put a wonderful post like this together. You don't miss a thing.
Thank you for showing me how to print out in sepia. I always use "black" and you showed me to think outside the box.
I'm getting tired of my cards and am looking for something like this.
Thank you so much Mel. I hope you are in good health.
hugs,
Beth
What a fantastic informative and inspiring post - Thank you x
Another fabulous project!! Thank you so much for being a constant inspiration to me and for sharing your time, creativity and digi freebies! You rock!!
Mel, you continue to amaze me with all the details that go into your projects, this is amazing.
Thanks Mel! You're AWESOME!
Oh wow...what a fantastic post....a beautiful card with so many details and then lots of instructions and inspiration...thanks so much.
Oh.. this is a lovely post. And such a lovely idea. Thank you for all your ideas and guidance. I might do this for a Mothers Day card.
Amiga,
O que dizer quando nos deparamos com uma artista.... Fiquei muda...
Lindo, lindo, lindo.
Abraços fraterno de muita luz.
WWW.ateliersuriel.blogspot.com
WWW.hospitalespiritualdomundo.blogspot.com
Lovely project. Thank you for sharing it, and the various elements, with us!
Lovely notebook Mel. It's so tasteful. I downloaded your damask pp. :o) TFS! Hugs!
Just a quick note to let you know that a link to this post will be placed on CraftCrave today [12 Mar 12:00am GMT]. Thanks, Maria
Hi Mel,
Great to see you again.
Super project! Your instructions are always so easy to follow. You have the neatest ideas :o)
Happy to hear you have a new computer. Hope you get your carrier issues settled soon.
Sorry to hear your DH is still so bad. I didn't know about the operation and huge scare!! Poor you guys :o(
We were also safe on the Island. Thank the Lord.
Praying for the people in Japan.
Hugs, Candy
Awesome- love the coloring tips and the fun project idea. Thanks for the digital papers-I love the look of the image printed in Sepia!
Super duper idea Mel! Will make one and link you up!
What a beautiful project! thanks so much for the tut and the freebies :)
An absoultely fabulous work of art!!! I nedd to go back now and have a long, long read to take in all the details!! Thanks so much for sharing! Ruth x
You are one amazing lady! Surely your recipient will treasure the notebook always.... All the little details, the fine stitching, the little bookmark - it's *lovely*!
Jeez, what a blog post. I mean awesome, so much to take in! All the different textures going on here are fabulous and the finished project...BEAUTIFUL and ready for Spring...YEEEES!
Yet another great tutorial that really helps. You make it look do-able with the details you put into it. Thanks a lot.
This is the most gorgeous project I've seen in a while. Thanks so much for sharing your beautiful work Mel =)
Mel, it seems that You have a lot more hours in one day than 24! LOL
Beutiful tender card - notebook and a great lot of work to structure the blogpost! Thank You! From now I'm Your follower!
Katya
What an absolutely BEAUTIFUL project. I love it.
First time I've visited, but I'll be back for sure.
Sandra x
Post a Comment